


 Francais
 Deutsch
 Italiano
Refine Your Search
-Cebu,-Philippines stock footage and images
- Showing 58933 to 58938 of 58986 results more
more Hide
Hide
Preparation of the Holloman High Speed Test Track (HHSTT) for fluid-submerged chimpanzee testing at Holloman Air Force base in New Mexico, United States
Shot of the Aero Med Fluid Tank sled, a rocket sled with a chamber designed to submerge a live animal test subject in water during acceleration and deceleration testing. Men work on and inspect the sled, long runway visible in the background. First Lieutenant A. V. Zaborowski prepares the subject's (chimpanzee) face mask. Men in hard hats prepare the sled. Panoramic shot of the rear of the sled. Close up of the chimpanzee's face mask used for submersion. A team of men work on the sled. Man uses pliers to adjust the face mask. The frame of a stretcher is inserted into the chamber of the sled.
Doctors prepare a chimpanzee for high speed fluid-submerged rocket sled testing at Holloman Air Force Base in New Mexico, United States
A stretcher carrying a chimpanzee is lifted from the back of a vehicle. The stretcher is placed on the ground, and doctors from the veterinary services branch of the Aero-Med Field Laboratory inject the chimpanzee's arm with a syringe. Close up of the chimpanzee, tied down to the stretcher. The doctors wait, monitoring their watch, and use a stethoscope on the sedated chimpanzee. A sticky glue paste is used to adhere a physiological monitoring array to the chimpanzee; an electrode is connected to each breast and one leg. The chimpanzee is placed into a harness by a team of men. A man tests the breathing mask which will be put on the chimpanzee. The chimp is brought to the fluid chamber of the Aero Med Fluid Tank sled and attached to the frame inside. A man in a shirt and tie speaks with the team of men. The breathing mask is test-fitted on the chimpanzee, then removed, and a glue is applied around the face. Shot of the team of men standing at the sled before test with live animal is conducted.
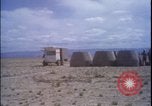
Chimpanzee submerged in rocket sled chamber for testing at Holloman Air Force Base in New Mexico, United States
Shot of a man in a mobile fire control station. A large team of men stand around the Aero Med Fluid Tank sled, which holds a live chimpanzee. Shot of the chimpanzee in full testing gear including intricate harness and breathing mask. The door is closed and the fluid chamber is filled with water, submerging the chimpanzee during the animal test operation. Close ups of the chimp through the overhead glass viewing port. A hatch on the top of the chamber is closed. Excess water spills out a small drainage spout. The hatch on top is opened and a man sticks his arm inside the chamber. Plastic wrapping is removed from the sled. Shot shows the sled and runway extending into the distance. A truck arrives carrying solid rocket motors, also called "rocket bottles." A canister is lifted by crane.
Rocket sled carrying water-submerged chimpanzee is launched at Holloman Air Force Base, New Mexico, United States
Sweeping shot captures the fiery launch and run of the Aero Med Fluid Tank sled, which carries a chimpanzee submerged in water during live animal testing. The rocket sled accelerates along the Holloman High Speed Test Track (HHSTT) at great speed, a fiery blaze behind. Second, closer view of the launch. Scene changes to post-launch. The door of the fluid chamber is opened and water is drained. Men inspect the chimpanzee inside. Close ups of the harnessed chimp, chest rises and falls. The chimpanzee, strapped to a stretcher, is removed from the sled chamber. Harness is removed and the chimpanzee is transferred to the back of a vehicle. Close up of the now-empty stretcher and harness rig.
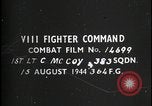
Aerial combat footage by First Lieutenant McCoy of the 383rd Fighter Squadron, U.S. Army Air Force, over Europe during World War 2
Aerial combat footage filmed in Europe during WW2 by USAAF First Lieutenant McCoy of the 383rd Squadron, 364th Fighter Group, VIII Fighter Command, on 15 August 1944. An aircraft is visible in the distance, the ground far below. Gun camera footage on aircraft shows closing of the distance and it opens fire, dislodging a piece of sheet metal from the right wing of the target German aircraft. Scene cuts to what appears to be the destroyed target German aircraft on the ground.
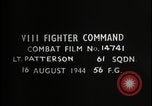
U.S. Army Air Force (USAAF) Ground-attack aircraft strafes train causing explosion of train car during World War 2
Filmed in Europe on August 16, 1944, during WW2 by Lieutenant Patterson of the 61st Squadron, 56th Fighter Group, VIII Fighter Command. Gun camera footage shows aircraft flying low, firing at the front of German or German held railroad train. Second pass, aircraft causes damage to the middle of the train, plumes of smoke. Third pass, the shelling causes a train car to explode, debris flies through the air. Final pass, the ground-attack plane shells the train again causing plumes of smoke and dust.
CRITICALPAST.COM: About Us | Contact Us | FAQs - How to Order | License Agreement | My Account | My Lightboxes | Shopping Cart | Advanced Search | Featured Collections | Website Terms & Conditions | Privacy Policy ©2026 CriticalPast LLC.
License Agreement |
Terms & Conditions |
Privacy Policy
©2026 CriticalPast LLC.