


 Francais
 Deutsch
 Italiano

Refine Your Search
1941 hong kong stock footage and images
- Showing 1567 to 1572 of 1637 results more
 Hide

Hitler and German General Staff plan Operation Barbarossa in Berchtesgaden
Snow-covered hills at Berchtesgaden. Inside a building, Hitler plans Operation Barbarossa (invasion of the Soviet Union) with his General staff. Among others present are, General Heinz Wilhelm Guderian; Colonel General Franz Halder and Colonel General Ludwig Beck. Animated map shows planned offensive against the Soviet Union and thence through the Caucauses and into Mideast oil fields. Further grand schemes are illustrated. Ocean supply lines needing to be choked off at Murmansk, Russia, and in the Mediterranean are diagrammed. German U-boat bases are shown on the map. View of a U-boat displaying skull and cross bones on conning tower. U-boat reinforced concrete pens. Map showing U-boat missions.
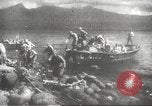
Japanese troops arrive at a shore and advance through jungles into Manila, Philippines.
Invasion of Manila, Philippines by Japanese troops during World War II. Japanese troops arrive at a shore. They fire rifles and machine guns. Smoke in the foreground. Damaged buildings and a church. Japanese tanks and infantry advances through jungles into Manila.

Civilians in a Catholic church and near monuments in Manila, Philippines, shortly before World War 2
Landmarks and activities of people in Manila, Philippines before World War II. Aerial view of the city. Buildings and houses along the sides of a street. Mountains in the background. Towers of San Agustin Church in Intramuros and the Minor Basilica of the Black Nazarene in Quiapo, Manila. Cyclists, horse-drawn kalesas, and pedestrians on a street in Quiapo district. The towers of San Sebastian Church. Filipino civilians attend a Roman Catholic mass. A plaque reads “Roman Catholic Cathedral of Manila”. Nuns and civilians walking outside a church in Manila. Old Filipino woman shielding herself with a fan. A Filipino woman holding her son. Church bells ring. Monuments in Manila. Bonifacio Monument or Monumento (596 Monumento Rotonda, Caloocan, 1401 Metro Manila) in Caloocan, Philippines. People on the streets around the Rizal Monument (1225 Roxas Blvd, Ermita, Manila, 1000 Metro Manila).
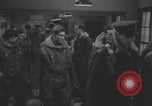
RAF crew of Vickers Wellington OJ-F start engines during WWII.
Period dramatization: British Royal Air Force (RAF) bomber pilots, part of No. 149 Squadron RAF suit up after a briefing on a mission during World War 2 at RAF Mildenhall. A pilot finds his helmet under a seat after a meeting. View of a Vickers Wellington OJ-F 'F for Freddie'. Crew disembark from a military truck after their arrival at bomber. Crew climbs ladder into bomber. View inside Wellington bomber as crew prepares for mission. Radio operator seated and adjusts radio. Pilot puts on his helmet inside the cockpit. A nose gunner climbs through fuselage of Wellington bomber to the nose gun. View outside bomber as gunner prepares inside nose gun. Pilot yells, "start her up" as ground crew members hold bag against engine manifold during startup. Propeller of Vickers Wellington OJ-F begins to move. Other engine is similarly started. Vickers Wellington bomber running its engine before takeoff. Ground control equipment that appears to be ground controlled approach radar equipment (GCA) is towed into place on the airfield.
Vickers Wellington No. 149 Squadron RAF takes off during WW2
Period dramatization: British Royal Air Force (RAF) station groundcrew assist Vickers Wellington No. 149 Squadron RAF during taxiing and take off from RAF Mildenhall airfield during World War 2. A ground control crew member salutes to an officer, the air controller, entering the control room of a portable ground controlled approach radar equipment (GCA) room. Air controller stands on a wooden stool to look through a bubble window in the control room’s ceiling. Air controller tests his radio, saying, "ground control, are you receiving?" View of air direction indicator on air field. Engines running on Vickers Wellington bomber at sunset along with "OC" on fuselage. “You may taxi out and take off!” the air controller says after a pilot asks for clearance on the radio. A Vickers Wellington bomber taxiing. Evening view of lighted bubble window of air control trailer as air controller inside watches the Vickers Wellington bomber taking off. Vickers Wellington bomber flying over RAF Mildenhall airfield. “C for Charlie airborne sir! Nineteen hours thirty-five minutes!” a RAF officer says as he enters air control trailer. Air controller standing in control room dome relays information, saying, "C Charlie took off 19:35." Inside air control headquarters at RAF Mildenhall as RAF officer smokes a pipe while another RAF officer writes flight information on the blackboard. More Vickers Wellington bombers taxi and take off from the airfield one by one. Vickers Wellington OJ-F 'F for Freddie' kicking up dust as groundcrew watches. Vickers Wellington OJ-F 'F for Freddie' taking off as the last Vickers Wellington bombers in No. 149 Squadron departs for Germany at night. View of pilot in Vickers Wellington as he radios to crew, "OK chaps, here we go!" RAF officer writes down the last aircraft’s departure time as “19:51”.
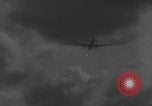
British Vickers Wellington bomber commander radios his crew members while in flight during WWII.
Period dramatization: Vickers Wellington bomber in flight over RAF Mildenhall air field during World War 2. Vickers Wellington OJ-F navigator removing maps from his pack. Pilot and copilot seen through bomber cockpit window at night. The commanding officer radios his crew. View of nose gunner at night as he replies, "I'm OK skipper." Another crew member puts on an oxygen mask and replies. Crew members each reply, including radio operator at his controls, who says, "well, it seems to all be here, sir." Commanding pilot communicates with the copilot inside cockpit, saying, "hello second pilot, ready to do some oil pumping?" The copilot replies, "that's all a second pilot's for!" “Freihausen, here we come” says the commander (Note: Freihausen is a fictitious location). Vickers Wellington OJ-F , part of No. 149 Squadron RAF, in flight at night.