


 Francais
 Deutsch
 Italiano
Refine Your Search
Adak Alaska USA 1943 stock footage and images
- Showing 10639 to 10644 of 27381 results more
more Hide
Hide
Game 1 of the 1916 Baseball World Series - Boston Red Sox versus Brooklyn Robins at Braves Field in Boston
Scenes from baseball World Series game 1 in 1916 with the Boston Red Sox versus the Brooklyn Robins (later the Brooklyn Dodgers). View from stands during first four innings of play (Boston Red Sox ultimately rallied with 4 runs in 9th inning to defeat the Brooklyn Robins). A large crowd of 40,000 gathered at Braves Field in Boston, with the game played there instead of Fenway Park so that more fans could attend. Game in progress. Men watching from the stands. Crowd waving hats and cheering. Scenes include: 0:04 Top of the 2nd inning double play by Boston after hit by Brooklyn's George Cutshaw; 0:11 Bunt single by Boston's Larry Gardner and Lewis advances to second base; 0:25 Sacrifice bunt by Boston's Everett Scott; 0:32 slate text on film reads, "In the third Duffy Lewis, famed for breaking up World Series' games drives a two base hit sending Hoblitzel home with the first run; score 1-0." (spelling should be Hoblitzell). This play is then seen; 0:40 Same play seen from different angle in the ballpark; 0:52 A play from before the previous play -- this is a triple by Hoblitzell with no one on base; 1:05 Top of the fourth inning: Go ahead run is at 3rd. Cutshaw hits a fly to right field. Harry Hooper catches the ball and throws out Zack Wheat at the plate. Men in stands cheering and waving hats.
The launching of the first pilot-less aerial torpedo at Carlson Field in Arcadia, Florida.
A review of research and development in guided missiles by the United States Air Force from 1919 to 1948. A civilian technician assembles first pilot-less aerial torpedo at Carlson Field, in Arcadia Florida. A launching track and gear. Technicians work on the missile beneath camouflaged netting. Attempted launching of the missile results in a crash due to track failure. The missile is launched and takes off. First successful launching of the aerial torpedo on October 24, 1919. The missile crashes immediately after the take off. First successful flight on October 2. Aerial view of hangars and airstrips of Wright Field in Ohio during early 1940s.
A DT-15 torpedo with air frames attached is dropped in water in the United States.
A review of research and development in guided missiles by the United States Air Force from 1919 to 1948. A DT-15 torpedo with air frames attached. The DT-15 is attached to the bottom of an aircraft. This is a preset control glide missile. DT-15 drops. It descends towards water. About 50 feet above water surface the air frame separates from the torpedo. Wake left by the torpedo as it goes through water. A freighter is hit by the torpedo. Explosion on the freighter. Black smoke rises up from water.
A GB-1 bomb is dropped from a B-17 and the launch of a GB-8 missile in the United States.
A review of research and development in guided missiles by the United States Air Force from 1919 to 1948. A GB-1 bomb is suspended from a chain hoist in the interior of a laboratory. This is a preset glide bomb. A B-17 with GB-1 attached, takes off. The B-17 in flight with GB-1s attached to the bottom of the aircraft. Aerial launching of the GB-1 from the B-17. Side view of a GB-8. Flares attached to the tail section of the GB-8. This is a radio-controlled missile, flares are used to assist in guiding the missile to target area. The GB-8 descends. Smoke trails behind. The GB-8 hits a flat open desert terrain. (World War II period).
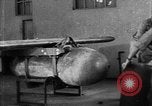
Dropping of a heat seeker missile, GB-6 from a B-17 flying fortress in the United States.
A review of research and development in guided missiles by the United States Air Force from 1919 to 1948. GB-6, a heat seeker missile, is assembled in a work laboratory. Men attach the homing device to the heat seeker unit then attach the same to the nose section of the GB-6 airframe. They test the heat seeker missile by holding a match flame in front of the same. Activating section of the heat seeker missile. A B-17 flying fortress in flight launches the GB-6 missile. The missile descends.
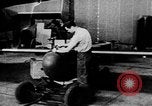
Dropping of an Azon bomb from a B-14 Liberator aircraft in the United States.
A review of research and development in guided missiles by the United States Air Force from 1919 to 1948. A GB-7 missile crashes in a scrubby wooded area. A GB-7 missile is assembled in a work laboratory. Men remove the protective cover from the nose section of the radar unit. A technician starts operating the radar unit in the nose section of the missile. The radar unit in operation. A radio control unit is mounted on the tail assembly of the bomb. Demonstration of the small stick control radio unit and control sections of the Azon bomb. A B -24 Liberator in flight drops a single Azon bomb. The bomb hits a bridge across a river. Multi drop of Azon bombs shows many smoke trails left by flares attached to the tail section of the bomb. The bombs drop on parallel course with a road leading through a wooden area. Razon bomb suspended from a chain hoist. Inserting a flare unit into the tail section of the Razon bomb. Two bombs are dropped at the same time. A technician works on the heat seeker section of a GB-6 free falling missile. A British Tall Boy bomb. The Tall Boy is the VB-13 bomb. (World War II period).
CRITICALPAST.COM: About Us | Contact Us | FAQs - How to Order | License Agreement | My Account | My Lightboxes | Shopping Cart | Advanced Search | Featured Collections | Website Terms & Conditions | Privacy Policy ©2026 CriticalPast LLC.
License Agreement |
Terms & Conditions |
Privacy Policy
©2026 CriticalPast LLC.