


 Francais
 Deutsch
 Italiano
Refine Your Search
Greek-Civil-War stock footage and images
- Showing 1771 to 1776 of 27579 results more
more Hide
Hide
Montage of scenes depicting America in World War I, from 1917 to 1919.
U.S. President Thomas Woodrow Wilson signs the declaration of war during World War I. U.S. ships sink after torpedo attacks. United States troops aboard a troop carrier ship bound tor France. Assistant Secretary of the Navy, Franklin D. Roosevelt. U.S. troops disembarking on docks in France. Navy ships being built in U.S. shipyard. Allied troops attack across no man's land. Allied rail gun firing. U.S.Soldiers fire howitzers. Smoke pours out of Allied biplane aircraft after being shot down. German troops fighting in trenches. A horse falls into a trench after being shot. Tanks in action. Tanks advance and fire. German machine gunners. German prisoners walk in a line. American troops in France celebrate the end of hostilities with the Armistice on the 11th hour of 11th day of 11th month, 1918. The American flag flies on a pole as a symbol of victory. Huge crowds of Americans celebrate in Manhattan, New York city, waving newspapers with headlines announcing German surrender. In 1919, President Wilson and General John (Black Jack) Pershing review victorious American troops marching in Chaumont, France (Pershing's headquarters). Franklin D. Roosevelt, Assistant Secretary of the Navy with Secretary of the Navy, Daniels, in France. U.S. troops board transport ships to return home after war. Returning U.S. Armies hold a victory parade in Manhattan, New York City, where they parade through a temporary Victory Arch constructed expressly for the purpose in Madison Square. Hydrogen balloons decorate the Arch. New York City mounted police monitor the crowds.
British troops in trenches don gas masks after hearing a warning by a Strombos horn on the Western Front in World War I
British troops in deep trenches lined with woven branches, on the Western Front in World War 1. Slate refers to gas alarm with Strombos horn. British soldiers immediately don their gas masks and take up defensive firing positions in their trench. Gas fumes are seen drifting over the trench. View from the trench, of gas cloud over No-Man's land, with barbed wire and some snow on the ground. [Note: The Strombos horn,was operated by compressed air and could be heard for several miles. But as use of gas shells increased, and such attacks tended to be localized, other alarms were employed, instead, such as metal shell cases, steel triangles, watchmen's rattles, klaxon horns, etc.] (World War I; World War 1; WWI; WW1)
British troops go through gas attack drills on the Western Front in World War I
British troops conduct an anti-gas drills on the Western Front in World War 1. The scene is a deep trench complex with woven twig lining. Snow covers the ground around the trenches. A British sentry pedals a gong while putting on a gas mask and lowers the door of a gas proof dug out. Soldiers clear out of unprotected trench area and are later seen cleaning rifles, when a gas alarm sounds and they don gas masks and take up firing positions in trench. A medic helps a gassed soldier and puts on his mask. (World War I; World War 1; WWI; WW1)
Allies prepare for final offensive in World War 1. Views of key commanders and leaders on all sides.
Generals of united Allies Armies prepare the final offensive against Kaiser Wilhelm II in Europe during World War 1. Marshal Ferdinand Foch, British Field Marshal Douglas Haig, French General Philippe Petain, United States Army General John Pershing and Italian Commander General Diaz gather in discussion. Closeup of Marshall Ferdinand Foch. Marshall Joseph Joffre talking to U.S. Army General Pershing. King Victor Emmanuel and General Diaz reviewing troops. Field Marshal Haig posing with a group of Generals. Marshal Ferdinand Foch and Marshal Philippe Pétain together. Georges Clemenceau greeting French officers. U.S. Secretary of War, Newton D. Baker, passes by a line of French soldiers and is seen using binoculars in the field. American General Bliss (Tasker Howard Bliss), U.S. representative on the Supreme War Council, speaking to a woman as other officers stand by. Closeup view of U.S. Army General Robert Bullard, Commander of the First American Army. General John Lejeune, Commander of U.S. Marines, speaking to a group. Kaiser Wilhelm II with his heir, Crown Prince Wilhelm of Prussia, in front of a building as the Kaiser speaks to a German officer. German Field Marshal Paul von Hindenburg with General Erich Ludendorff. German military band leads large column of German soldiers marching on a road. Long line of German soldiers walking up a turning road. British soldiers improving roads and transporting supplies. British soldiers and cavalry riding on horseback. Long line of British soldiers marching through trench and through a bombed out building. British soldiers marching on road. Allies, British and French forces on the move. U.S. General Pershing addressing a huge crowd of soldiers in an open field area. Lines of American soldiers marching. Colonel Teddy Roosevelt watches as U.S. Army soldiers advance. Italian Army soldiers marching and ascending a hill. Huge artillery piece being towed on a road.
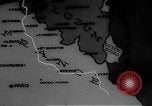
Canadian troops in action around the town of Albert, in West Flanders, Belgium during World War I
Canadian troops in West Flanders, Belgium near Ypres and Albert during World War 1. An animated map shows the region and the Somme River. Canadian troops hunkered down in grass and shrubs on a hill overlooking flat terrain. Shells exploding on horizon in background. A large contingent of Canadian troops marching downhill with left-shouldered arms. Senior officers walk out of a courtyard gate. Next, General Sir Sam Hughes, Canadian Minister of Militia and Defence, is seen shaking hands with several officers. Scene shifts, after he greets only two, and shows Canadian troops marching in platoons along a dusty road. Next, Canadian soldiers are seen moving supplies by horse-drawn wagons along a tree-lined road leading into a town. Final scenes show the war-damaged Albert Basilica. The camera pans upward, along its tower, to the Golden Virgin statue at its top, which is leaning precariously to one side, almost falling off its base. (The statue became the subject of British superstition that the war would end when the statue fell. But British artillery, itself, knocked it down while targeting the tower to prevent its use by the Germans as an observation post, during the 1918 Spring offensive)
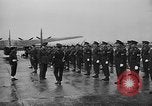
Various Allied Generals assume new commands in Italy during December, 1944, World War II.
On 12 December, 1944, at an airport in Naples, Italy, British General Sir Henry Nathan Wilson inspects an honor guard of American Military Policemen in formation. (Narrator states he is en route to replace the late Field Marshal Sir John Dill, in Washington, DC, USA) A contingent of British troops is also present as part of the honor guard, on the wet airport tarmac. (Narrator states that Wilson will head the British Joint Staff Mission and be personal military representative for Prime Minister Winston Churchill.) He approaches a line of U.S. military officers who salute him. Closeup of General Wilson With U.S. Army Air Forces Lieutenant General Ira C. Eaker, next to U.S. Vice Admiral Kent Hewitt. Also with them (back to camera) is British Admiral Sir John Henry Dacres Cunningham, Commander-in-Chief for the Mediterranean Fleet. Next, General Wilson and his party are seen boarding a British Avro York four-engine Heavy Transport aircraft. View from the ground, of the aircraft cockpit and the engines running as it taxis out for takeoff. Change of scene shows troops gathered in open air battlefield environment. General Mark Clark, now Commander-in-Chief of the Allied 15th Army Group, decorates some members of the 5th Army, as General Lucian King Truscott Jr. (new 5th Army Commander) stands by his side. General Clark says farewell to members of the 5th Army and shakes hands with many of them. (World War II; WW II; World War 2; World War Two)
CRITICALPAST.COM: About Us | Contact Us | FAQs - How to Order | License Agreement | My Account | My Lightboxes | Shopping Cart | Advanced Search | Featured Collections | Website Terms & Conditions | Privacy Policy ©2026 CriticalPast LLC.
License Agreement |
Terms & Conditions |
Privacy Policy
©2026 CriticalPast LLC.