


 Francais
 Deutsch
 Italiano
Refine Your Search
John-F.-Kennedy stock footage and images
- Showing 1363 to 1368 of 3759 results more
more Hide
Hide
F-104A Starfighter is towed by a tug and taken for parking at Palmdale airport in California.
F-104A Starfighter at Palmdale airport in California. A man on a tug. F-104A Starfighter towed in front of the hangar. The aircraft is towed forward few feet and stopped. A bus and car in the background. F-94C Starfire inside the hangar. Tug tows the aircraft forward until the tug is out of frame. A pilot in the cockpit. Tanks near a hangar. F-104A towed by the tug out of the hangar. Tug makes a 90 degree turn and tows F-104A. Tug tows F-104A and takes a left turn. Cars parked near hangar. F-104A towed along strip and aircraft makes a right turn. The tail and rear fuselage of the F-104A. A sign reads 'FG 956'. F-104A is parked on the edge of ramp. Three men stand next to the nose of aircraft
United States F-105 aircraft carry bombs as they leave for an air strike on North Vietnam during Vietnam War.
United States F-105Ds and F-105Fs leave for a mission in Vietnam during the Vietnam War. United States F-105 Ds and F-105 Fs parked along the runway in Vietnam. F-105Ds and F-105 Fs with 750 lb general purpose bombs, pull out of the parking and taxi down the runway. A F-105D with Wild Weasel pod and a F-105F with a Shrike taxi along the runway as they leave for the mission. Pilots in the cockpit of aircraft as it taxis.
MB-1 rocket rail-launched from a U.S. Air Force F-102A Delta Dagger at Holloman Air Force Base in New Mexico.
MB-1 rocket rail-launched from a U.S. Air Force F-102A Delta Dagger at Holloman Air Force Base in New Mexico. Footage taken from GSAP (Gun Sight Aiming Point) camera mounted under right wing of F- 102 in flight. MB-1 rocket fired from rail launcher. Technicians work on F-102A parked outside a hangar. Two technicians wheel an MB-1 rocket on a dolly, underneath F- 102A parked on ramp. Three technicians check out and calibrate special instrumentation to be used during the test run. The instruments include different types of oscillographs, and photo panels. Special camera installations made on the F-102A vertical stabilizer, fuselage, and wings. Technician installs a l6mm camera inside the aircraft nose, then closes access panel. F-102A takes off. Radar vectoring station T-1 at Holloman AFB. Technician operates one of the tracking scanners installed on roof of building. Two men, inside the vectoring station, control the course of the test aircraft by radio communication from the vectoring machine plotting charts. The pilot in F-102A cockpit as he turns on the recording cameras to activate the armament system. MB-1 bomb extended below the aircraft. Engineer talks on the radio phone inside the vectoring station. Pilot's hand on the control stick as he activates the firing switch. MB-l rocket is fired from the short rail launcher. The aircraft is enveloped in a trail of white smoke. GSAP camera mounted underneath the right wing of the F-102A, shows the MB-l rocket being fired from the short rail launcher. Smoke due to the firing of the rocket.
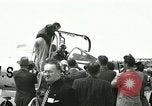
F-104A Starfighter pilots pose for newsmen at Palmdale airport in California.
F-104A Starfighter at Palmdale airport in California. Cameramen photographs test pilot seated in cockpit of F-104A. A hangar building in the background. Test pilot poses in F-104A for civilian newsmen. He comes out of the plane. Two Lockheed test pilot pose for newsmen at the nose of F-104A. Nose of F-104A. Newsmen are gathered in the background photographing test pilots. View of fuselage of aircraft and the tail. Test pilot climbs into the cockpit of F-104A. Second test pilot climbs stand and converses with first pilot inside the aircraft. Two test pilots pose for the press. One of the test pilots climbs and stands into the cockpit. Tip of the pilot tube on the F-104A. Fuselage of aircraft. Canopy is open on the plane. Canopy is closed on the aircraft. Newsmen stand at the rear of aircraft. F-104A stands in front of the aircraft. Several newsmen look at the aircraft.
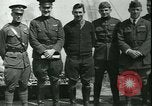
Pilots of the 148th Aero Squadron stand in front Sopwith F-1 Camel aircrafts.
Pilots of the 148th Aero Squadron stand in front of Sopwith F-1 Camel aircrafts. Pilots include Lt. L T Wyly, Lt. L W Rabe, Lt. F E Kindley, Lt. W B Knox and Lt. J A Creech. Flight Commander Lt. F E Kindley stands beside his bulldog Fokker which is on the aircraft propeller of the Sopwith F-1 Camel. Members of the flight stand in front of Sopwith F-1 Camel. Members include Lt. R R Cunnius, Lt S Q Noel, Flight Commander Lt. E W Springs, Lt L K Callahan, Lt. O A Ralson and Lt. J Jenkinson, Jr. Flight Commander Lt. E W Springs leans against the wing of Sopwith F-1 Camel aircraft and reads a newspaper. The members of C Flight include Lt. W PAvery, Flight Commander Lt. Henry R Clay, Lt. E H Zistell, Lt. T L Moore, Lt. G O Dorsey and Lt. T M Galbreath. Flight Commander Lt. Henry R Clay leans on the wing of Sopwith F-1 Camel. Morton N Newhall leans against the wing of Sopwith F-1 Camel, with his German Shepard dog named Shadow on the wing of the aircraft. (World War i; World War 1; WWI; WW1)
U.S. Navy maneuvers at sea involve aircraft carrier and Naval Carrier Wing of F-4 Phantom aircraft
U.S. Navy film about aviation, entitled "Wings for the Fleet." Movie opens with view of an F-4 Phantom aircraft in flight. It displays Carrier Air Wing 15 tail code "NL,"and the number "2316" on its fuselage. Closeup of pilot in front seat of the F-4. "LT. J.G. D.H. Rogers is painted below the canopy. Change of scene to Navy warships on maneuvers. The USS King (DL-10/DLG-10/DDG-41) a Farragut Class (also known as Coontz Class) guided missile destroyer and and the Aircraft Carrier, USS Coral Sea (CVA 43) with deck full of F-4 Phantom aircraft. An F-4 aircraft is seen on combat air patrol overhead. A closeup shows it is the same aircraft shown earlier, piloted by Lt JG D.H. Rogers. The F-4 rolls over and dives. Scene shifts to combat control center aboard the aircraft carrier, where controllers convey target information to the F-4. View of pilot in cockpit and his missile targeting display. He is cleared to arm missile and fire. Interior of his cockpit as he engages the arm toggle switch. The F-4 fires a missile that is seen striking and destroying a drone target, which falls flaming into the sea. Back in the control room, a sailor wipes clean the plexiglass display he was using to track the action. View of F-4s landing on the USS Coral Sea, and view from cockpit of Lt JG D.H. Rogers' plane being guided into parking position on her flight deck. His plane Captain climbs aboard the wing and helps him remove items from the cockpit. Rogers stops to discuss something with the plane Captain and they walk together towards the Carrier Island.
CRITICALPAST.COM: About Us | Contact Us | FAQs - How to Order | License Agreement | My Account | My Lightboxes | Shopping Cart | Advanced Search | Featured Collections | Website Terms & Conditions | Privacy Policy ©2026 CriticalPast LLC.
License Agreement |
Terms & Conditions |
Privacy Policy
©2026 CriticalPast LLC.