


 Francais
 Deutsch
 Italiano
Refine Your Search
Prison physical examination. stock footage and images
- Showing 2491 to 2496 of 3715 results more
more Hide
Hide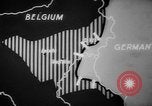
British and American troops join together for attack during Battle of the Bulge, scenes from Malmedy massacre and Houffalize (WW2)
Map points to Allied positions during Battle of the Bulge in World War II. British soldiers walk in a trench on the prong of the attack south of La Roche en Ardenne (La Roche-en-Ardenne or sometimes just Laroche). Trench in the snow covered area. British soldiers wear warm clothes and try to stay warm in the trench. British soldier knocks hole in ice and draws water into a bucket. British soldiers wash and shave with the freezing water. They heat water and use it to make cups of tea. They move on tanks to location where British and American forces meet and greet. The soldiers talk amongst themselves. On 14 January 1945 armored recce cars of the 2nd Derbyshire Yeomanry, 51st Highland Division, meet GI's of the 347th Infantry, 87th U.S. Infantry Division, near Ortheuville. The first link up between troops of VIII Corps and British 30 Corps. Another encounter between British soldiers, dressed in white camouflage smocks, with Americans of the 87th U.S. Infantry Division at Champlon. Later that same day. Field Marshal Montgomery wearing a new beret, commands the northern forces. British soldiers advance on a roadway and supplies move on vehicles. Houses in the background. U.S. 3rd Army soldiers shovel snow during a blizzard, clearing the way for trucks with supplies and mail to pass. Large tractors with snow plow attachments clear snow. On January 14, 1945, American forces gently sweep snow from the bodies of American soldiers at Malmedy who had surrendered to the Germans a month prior but were then massacred. (These were mostly U.S. forces of the American 285th Field Artillery Observation Battalion) German prisoners of war look on apprehensively as the Americans uncover the victims of the Malmedy Massacre. American soldiers look at from a snow covered hillside into the village of Houffalize in Belgium. A twisted sign for Houffalize is seen, and wreckage and destruction in the town. Close views of wrecked and burned homes in Houffalize. Destroyed tanks with one tipped in a river
The Fall of Corregidor in World War II
Opening shows affidavits attesting to the authenticity of source films. Views of the island fortress of Corregidor, as Japanese troops occupy it while Americans and Filipinos stand with hands up, in surrender. Japanese and American Army officers having discussions. Scene shifts to Lieutenant General Jonathan Wainwright with members of his staff: Brigadier General Lewis C. Beebe; Lieutenant Colonel John R. Pugh; Major William Lawrence; and Major Tom Dooley, as they arrive at the Japanese headquarters building on Bataan to discuss surrender. They line up outside the wooden building and are saluted by the Commander of the 14th Japanese Imperial Army, General Masaharu Homma, as he climbs the steps of the building. Next, the Americans are seen seated at a table on the porch, opposite General Homma, who has General Wachi at his left and Colonel Nakayama, to his right. Reporters, an interpreter, newsreel camera men and others are also on the porch. General Homma and Wainwright discuss surrender. (These discussions proved fruitless, as Homma demanded surrender of the entire Philippine Garrison, and Wainwright tried to avoid that, citing lack of authority. Accordingly, Homma curtailed the meeting, and Wainright and staff returned to Corregidor, where, on May 6, 1942, he finally surrendered all forces in the Philippines to Japanese Colonel Sato, commander of the 61st Infantry.) Camera outdoor pans over Corregidor Island. Scenes of prisoners standing in the so-called Garage area of Corregidor, where American and Filipino POWs were interred, following their surrender on May 6th. The remainder of the film shows various scenes of POWs on Bataan, moving under Japanese guard. A makeshift sign points the way to Mariveles, where the infamous Bataan Death March commenced.
German field hospital in courtyard of destroyed Chateau de Pinon during World War I
Views of the destroyed Chateau de Pinon, in France during World War 1. Several large field hospital tents are set up in the courtyard. Both German and French soldiers are seen carrying wounded. (The French soldiers are likely prisoners of war.) (WWI; WW1)
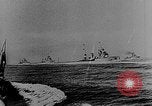
The siege of Malta and the North Africa campaign during World War II.
Italian warships maneuvering in the Mediterranean during World War 2. Destroyers pass a Corazzata-class Italian battleship. Italian IMAM Ro.43 reconnaissance planes are launched from a battleship. Two Corazzata-class Italian battleships underway. Change of scene shows the island of Malta, viewed from a low flying airplane. A formation of Italian CANT Z.508 seaplane bombers flying overhead to attack Malta. View from ground on Malta of anti-aircraft flak burst clouds in the air above. Smoke rising from bomb bursts. Glimpse of a large British warship slowly easing out of its dock. Single engine aircraft overhead moving through heavy flak clouds. More bomb explosions. Local civilian people and refugees, including many children, seeking safety from bombing. People perusing destroyed buildings. A formation of British Bristol Blenheim light bombers in flight over North Africa. British forces firing artillery in Libya. War materiel abandoned by retreating Italian forces in Eritrea and Somaliland. British troops and a contingent of Ethiopian troops march into Addis Ababa, escorting Emperor Haile Selassie as he is restored to his throne in May, 1942. Next, German armor in North Africa is seen burning. A knocked out German tank viewed through window of a British armored vehicle. More burning German armor. German aircraft destroyed on the ground at an airbase. Bombs lined up on the ground. Huge number of Italian prisoners of war marching across the desert in Libya.
Variety of scenes involving British air and sea activities early in World War II.
Under the glare of bright lights in otherwise pitch darkness, German prisoners of war are being taken aboard a British ship during World War 2. Some are wounded on stretchers. Change of scene shows a British Short Stirling bomber being "bombed Up" at an RAF station in the UK during World War 2. Closeup of bombs being transported on dollies. Closeup of a General Purpose 1000 pound bomb. British airmen raising bombs into the bomb bay of a Short Stirling bomber. British aircrew standing in full flight gear in front of their aircraft. One crewman holds up a toy monkey by the tail. Next the last few crew members are seen boarding the aircraft by a rear door. Pilots in the cockpit. Copilot looking back over his seat toward the camera. Tail gunner seen in his position with belt ammunition visible. The aircraft taxiing out from its parking place. Next a De Havilland DH102 (Mosquito II) with radial engines, is seen taking off. It appears to have a special sensor package fastened underneath it. View of the aircraft in flight directly overhead. A Hawker typhoon aircraft taking off and then performing aerobatics overhead. The De Havilland Mosquito II maneuvering overhead. A Supermarine Spitfire aircraft maneuvering overhead. Shift to gun camera footage from numerous British aircraft strafing German ships. Views of British submarines being welcomed as they return from missions. Closeup of the deck gun on one submarine. Battle damage on part of the submarine. The British Royal Navy White Ensign flying at the Conning Tower of a captured German submarine. Closeup of bearded German U-boat officer. Several sailors on deck of a British submarine. Men waving their caps and cheering on shore to welcome returning submarines.

The Nazis attack a British convoy in the North Sea (WW2)
A British convoy underway in the North Sea in World War II. Nazi German forces attack the convoy. A British officer on the ship deck. Explosions from depth charges. Bombardment on the convoy. A British destroyer torpedoed. Smoke arises as the ship burns. German sailors in boat are rescued and become prisoners of war after their destroyer is disabled by British. View of damaged German destroyer.
CRITICALPAST.COM: About Us | Contact Us | FAQs - How to Order | License Agreement | My Account | My Lightboxes | Shopping Cart | Advanced Search | Featured Collections | Website Terms & Conditions | Privacy Policy ©2026 CriticalPast LLC.
License Agreement |
Terms & Conditions |
Privacy Policy
©2026 CriticalPast LLC.