


 Francais
 Deutsch
 Italiano
Refine Your Search
Tehran Iran 1943 stock footage and images
- Showing 1045 to 1050 of 3272 results more
more Hide
Hide
The British Navy captures fleeing German troops and General Eisenhower and General Giraud review a military parade in Tunis.
British Forces entrap Axis Forces in Africa. British warships patrol. German troops attempt to escape in small boats. The British Navy captures the fleeing Germans. A small boat near a shore. A dead soldier lay nearby. British General Eisenhower and French General Giraud review a gigantic French American military parade in Tunis. Allied planes fly overhead. American and French flags. Two girls wave to the marching armies. General Eisenhower and General Giraud salute to the armies. (World War II period).
Film about Allied bombing campaigns against the Axis powers and Japan all over the world during World War II.
Opening scene shows British Avro Manchester bombers lined up on a field in England during World War 2. British air crew board a bomber that taxis out for takeoff. View from inside the aircraft as it lifts off on takeoff and then towards its tail on climb out. Gunner seen manning machine guns as his turret rotates during flight. Formation of Manchester bombers en route to Axis military targets in German occupied France. View from bombardiers position of ground below. The bombardier seen and bombs dropping, as viewed from another bomber in the formation. View from a bomber of railroad yard and an airport with bombs exploding on the ground. Manchester bombers on return flight home over the English Channel. They pass below formation of U.S. B-17 flying Fortresses heading toward France. Close aerial view, from below, of the formation of B-17s overhead. Scene shifts to North Africa, where American Captain Eddie Rickenbacker, famous aviator of World War I, talks pilots of Major General Jimmie Doolittle's Bomber Command. Closeup of General Doolittle smiling outside a tent. A B-17 takes off. An Army cameraman seen inside at a window of the B-17. He is to record an attack on the Sicilian port of Marsala. View from a bomber of bombs exploding along the Port's coast, and of bombs passing the camera as they fall to earth. View from below of a B-17 with battle damage to its left elevator. View from a returning B-17 as it lands at its base in North Africa. Airmen walk around a B-17 that crash landed. One airman walks under part of a bomber tail destroyed by Axis gunfire. Scene shifts to the South Pacific and Allied air attacks against Japanese targets. A formation of B-24 Liberator bombers headed toward the Japanese held island of Nauru. Views of bombs striking the island. Scene shifts again, this time to Attu in the Aleutian Islands. A U.S. Navy PBY Catalina flying boat seen in flight. A task force of U.S. Navy warships in Aleutian waters. American amphibious landing on Attu. Arms and supplies piled up on a beachhead. American forces firing artillery. Infantry search for Japanese soldiers in hiding. Bodies of dead Japanese soldiers. American wounded carried on litters. A formation of B-24 bombers headed toward the Aleutian island of Kiska. Closeups of crew members in a B-24. View of glaciers and volcanic mountains below. A bombardier releasing bombs on a Japanese submarine base and airdrome. view of bombs falling. Formation of B-24s releasing their bombs. A gunner in a B-24 firing at attacking Japanese planes and then firing in a low level strafing attack. A U.S. fighter plane lands back at its base on a water-covered runway, raising waves of water that cover cover it.
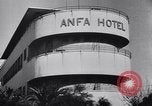
Allied leaders at the Casablanca Conference in Morocco during World War II. Allied forces battle Germans in Algeria and Tunisia
Film begins showing the Anfa Hotel in Casablanca, North Africa. Inside, Allied generals meet to plan further steps in World War 2, against the Axis powers. Charles de Gaulle and French General Henri Giraud are seen walking together at an airport. Closeup of the two. View of Allied General staff members around a table. U.S. principals include Army Chief of Staff, General George Marshall and Air Force Chief, Lieutenant General Henry H. Arnold. Views of General Dwight D. Eisenhower, Supreme Commander of Allied forces, His deputy for land forces, British Field Marshal Harold Alexander, his deputy for sea forces, British Admiral Andrew Browne Cunningham, and his deputy for air operations, British air marshal, Arthur William Tedder (1st Baron Tedder) Outdoors. President Franklin D. Roosevelt and Prime Minister Winston Churchill are seen seated, conversing. Churchill's airplane, named Commando, a very long range Consolidated Liberator II aircraft adapted for passenger transport is seen ready to take him to Tripoli to greet the victorious British 8th Army. Churchill greeting British Field Marshal Bernard Montgomery at Tripoli. Animated map shows battle lines and disposition of Allied forces along the Algiers-Tunisian front. View of German Field Marshal Erwin Rommel inspecting defenses at the Mareth line in Tunisia. Fifteen divisions of German, and 7 divisions of Italian troops entering the front lines. German Panzer IV aus d tanks moving on a dirt road. German infantry marching along a road. Seasoned German troops in camouflaged vehicles. Formation of German Focke Wulf 189 aircraft and view of one dropping bombs. General Rommel pointing to something at the front. Animated map showing the battlefront. (Narrator says German orders were to hold Tunisia at all costs.) View of Rommel, eating a sandwich as he studies document in a defensive position behind the Mareth line. German soldier using periscopic binoculars to view the front. German forces initiating an attack westward driving Allied forces back. Map show German forces advancing beyond the Kasserine pass. Rommel in a staff car, as he learns that the Allied forces have counter-attacked and are driving his forces back to the original battle lines. American infantry marching Eastward to reoccupy Kasserine Pass and beyond, past destroyed German tanks. Rommel's forces make an attack Southward toward the British 8th Army positions. View of new Tiger tank employed by the Germans. A British soldier removes the cover from their new 17 pounder anti-tank gun. View of burning Tiger tanks destroyed by the new British guns. (Narrator says 52 were left burning hulks.)
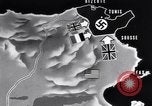
Allied Forces defeat Axis forces in Tunisia during World War II
The final battle of Tunisia, North Africa during World War 2. An animated map shows Allied Forces moving on all sides pressing forward against German forces still remaining in Northern Tunisia. in World War 2. Map outlines battles of Hill 609, Longstop Hill, Goubellat Plain, and Dejebel Mansour, and Takrouna. U.S. forces move 200 miles from the south to confront German forces in the north. Views of U.S. soldiers in trucks and M3 half-tracks, and towing heavy artillery with a tractor. Views of hills where Germans are positioned, west of Tunis and Bizerte. Allied guns firing. French forces sweeping for mines and digging some up with bayonets. French General Alphonse Juin confers with his staff as they review a large map laid out on a jeep. Brief view of French infantry in the field and gunners firing artillery. German Panzer IV tanks moving to counter British attacks. German tanks and artillery firing barrages against the British. Camera pans over destroyed German armor. British 78th Division attacks Longstop Hill. A long line of British infantry moving single file up a hillside. British soldiers firing Vickers machine guns from protected positions and infantry moving uphill, carrying small arms and Bren light machine guns. British troops scaling steep hills, using ropes, as shells burst close to them. One throws a hand grenade that explodes on the hilltop. After reaching the hilltop, the infantry scamper down the other side and continue moving forward, firing their weapons. Several dead German soldiers are seen as the British troops overrun the German positions. British engineers and pioneers working with caterpillar tractors and shovels to build roads. Later, trucks are seen using a new road. In the meantime U.S. troops are seen arriving to commence their assault on Hill 609. It begins with long range artillery firing from camouflaged positions and shells exploding all over on Hill 609. It continues into the night. View of soldiers in artillery headquarters, under a tent illuminated by lanterns. Long sequence of nighttime artillery fire. Medical Corps doctors treating wounded as the nighttime artillery barrages continue. U.S. infantry digging in after taking Hill 609. View of American soldiers walking up Hill 609. View of British Field Marshal Bernard Montgomery consulting with staff officers in the field. British 8th Army commander, Lieutenant General Sir Oliver William Hargreaves Leese, looking through binoculars as he stands with staff members at the front. Scene shifts to U.S. airmen arming machine guns on a parked P-38 fighter plane. Others roughly handling bombs to be placed into U.S. bombers. Bomber with nose art of devil riding a bomb and name "Hell a Poppin." Air crews arrive by jeeps at their B-25 Mitchell bombers and others arrive at their B-17 bombers. View of B-25 number 41-13202 named "Idaho Lassie" of the 321st BG, 445th BS, 12th Air Force. Engines running on bombers and on a British spitfire fighter plane. Formations of Allied aircraft, including B-24 liberator bombers, Martin B-26 Marauder bombers, British spitfire fighters, and B-17 Flying fortress bombers. British and American armor moving forward firing guns. French artillery firing and French infantry advancing. French machine gunners in white hats. U.S. B-24 Liberator aircraft dropping bombs. German fighter planes attacking allied bomber formations. Gunners in the bombers firing at them. Gun camera view of German fighter being shot down. More views of Allied aircraft bombing and strafing. Map shows American forces reaching Bizerte, the British capturing Tunis and German forces split and defeated.
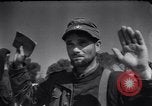
15 Divisions of German troops (266 thousand) surrender to the Allies, ending the Tunisia campaign during World War II
At beginning, the film shows German soldiers surrendering in World War 2. First they surrender in small groups and then in increasingly larger numbers. Eventually whole divisions are seen surrendering, some even marching behind their Division brass band. They are being interned in outdoor areas under guard. A U.S. Military policemen monitors some and collects identifications papers from them as they enter a barbed wire enclosure. Numerous views of the German soldiers, some arriving in full open railroad cars. German commander of the Army Group Africa, Generaloberst (Colonel-General) Hans-Jürgen von Arnim, followed by British officers, steps from a U.S. C-47 transport airplane and salutes. (He was captured by the British Indian Army’s 4th Infantry Division). Aerial view of the wheat field where the German prisoners were interned for processing. Views of numerous destroyed German aircraft, artillery, fuel trucks, tanks, and other war materiel. A pile of German steel helmets. Closeups of German prisoners in the outdoor compound. An unidentified German General stepping from the cab of a truck, to join the other prisoners. German Colonel-General von Arnim leaving a building and standing as if waiting for a car. Series of closeup views showing soldiers from the various countries comprising the Allied forces. Allied soldiers wading through deep waters; and elsewhere in amphibious assaults, as World War 2 continues. Cheering crowds in Tunis welcoming French, Free French, and British forces occupying the city. General Eisenhower standing before Allied flags, with British Field Marshal Harold Alexander, and French General Henri Honoré Giraud, as Allied warplanes fly in formation overhead. Film ends with "V" for Victory.
New Guinea natives carry supplies for the Allies and the Allies bombard a Japanese held island in the South Pacific.
War between the Allied Forces and the Axis troops in the South Pacific during World War II. New Guinea Papuan natives carry arms, ammunition and supplies for the Allies in a boat. An overnight camp of the Papuan people. The natives carry the supplies across mountains and makeshift bridges. The Australians inspect a Japanese submarine in Sydney Harbor, Australia. They remove the firing mechanism of the torpedo and the instrument which helps a torpedo to find its way once fired from a submarine. U.S. and Australian naval forces move towards a Japanese held island and bombard it. The sailors load and fire artillery. Smoke rises in distance as the shells hit the targets. U.S. Marines survey the damage. Dead Japanese soldiers. A lone U.S. Marine with captured Japanese prisoners.