


 Francais
 Deutsch
 Italiano
Refine Your Search
US-Gliders- stock footage and images
- Showing 14119 to 14124 of 21917 results more
more Hide
Hide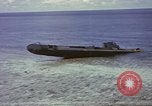
The Dutch submarine O 19 stranded on Ladd Reef in the South China Sea, near the end of World War II
Low altitude aerial views from an aircraft circling the Dutch submarine, O 19, stranded on Ladd Reef, in the South China Sea, with bow raised high above water and stern submerged. Note: According to Klaas van der Veen,of the Netherlands, whose father was second in command on the O 19, the boat went aground while on the way to Subic Bay, Phillipines, on July 8, 1945 (July 7th East of the International Date Line). After three days trying to free the O 19 using full reverse power at high tide, blowing air, firing torpedoes, and jettisoning ballast, the crew was rescued by the U.S. submarine, USS Cod, which torpedoed the O 19, after all critical equipment had been removed.
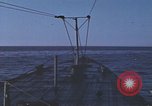
American submarine rescues a survivor from sunken Japanese warship and sinks a Japanese sailboat with its deck gun during World War II.
Film begins with view of forward deck on a U.S. submarine in calm waters, during World War 2. A Japanese survivor of a sunken warship is seen on a raft of wreckage. The submarine positions itself and lowers lines that the Japanese sailor uses to board the American boat, where he is taken as a prisoner of war. Closeup of a three-masted Japanese boat that begins to raise some sail as it is being observed. The sailboat seen at some distance with empty masts and no sign of anyone on board. View of the deck gun on the deck of the submarine. It fires and causes the sailboat to explode.
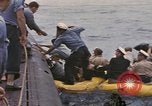
The USS Cod (SS-224) rescues crew of the Dutch submarine, O-19, from a reef, in South China Sea during World War II
Some of the Officers and men of the Dutch submarine, O-19, are brought to the U.S. submarine, USS Cod (SS-224) aboard yellow inflatable life rafts, after their boat ran aground on Ladd Reef, Spratly Islands, South China Sea, in final days of World War 2. They are helped from the life rafts by U.S. sailors. Dutch crewmen smile as they walk along the deck of USS Cod. More crew from the O-19, close by the Cod, step into life rafts. Crew of the Cod pull a raft in close with lines as the Dutch crew members throw personal belongings to deck of the Cod, and climb aboard. Officers and men of the O-19 standing on deck of the USS Cod.
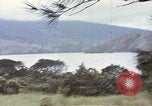
Commando team sets off explosion on Pacific island during World War II
View of Pacific island, bay, and rocky shoreline. A U.S. submarine maneuvering slowly in the bay. Surf rolling against shore. A small encampment seen on shore across inlet. Explosion occurs on nearby bluff. Three U.S. commandos emerge from foliage at shoreline. One of them cuts wires lying on shore. They move stealthily along the shore.
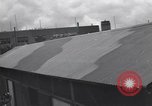
The USS Argonaut at a pier in Pearl Harbor after returning from the Makin Raid in World War II
The USS Argonaut (SS-166) docked at Pearl Harbor, Hawaii, after returning from the famous Makin Raid, by "Carlson's Raiders" of the 2nd U.S. Marine Raider Battalion, in World War 2. View from the pier of Major James Roosevelt, USMCR, Executive Officer, of the 2nd Raider Battalion (the President's son). He stands on the boat's bridge next to Lieutenant Commander John R. Pierce, USN, Commanding Officer of the Argonaut. Several sailors and another Navy officer are also present. The next scene shows U.S. Marine members, of the 2nd Raider Battalion, leaving the Argonaut and proceeding along the pier. Some of the Raiders shake hands and converse. They gather their gear from the boat deck. Sequence ends with many more Raiders leaving the boat.
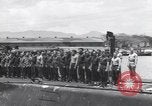
USS Argonaut (SS-166) returns to Pearl Harbor, from the Makin Raid, carrying Carlson's Raiders, during World War II
The USS Argonaut (SS-166) arriving at Pearl Harbor, Hawaii, after the Makin Raid, by Carlson's Raiders, of the U.S. Marine Corps, in World War 2. Admiral Chester Nimitz boards the USS Argonaut (SS-166) and shakes hands with its Commander, Lieutenant Commander John R. Pierce, as Major James Roosevelt (the President' son) salutes. Admiral Nimitz then shakes hands with him. (Roosevelt is Executive Officer of the U.S. Marine's Second Raider Battalion (Carlson's Raiders). Closeup of Roosevelt mingling with others on the boat deck. Raiders mingling on the deck. Closeup of Roosevelt conversing with Lieutenant Colonel Evans F. Carlson, USMC, Commander, Second Raider Battalion, who had arrived at Pearl Harbor on the USS Nautilus a little earlier. Carlson conversing with other Marine officers. Raiders starting to leave the boat. Sailors transporting a wounded sailor on a litter. Carlson and Roosevelt conversing with other officers.
CRITICALPAST.COM: About Us | Contact Us | FAQs - How to Order | License Agreement | My Account | My Lightboxes | Shopping Cart | Advanced Search | Featured Collections | Website Terms & Conditions | Privacy Policy ©2026 CriticalPast LLC.
License Agreement |
Terms & Conditions |
Privacy Policy
©2026 CriticalPast LLC.