


 Francais
 Deutsch
 Italiano
Refine Your Search
US-Gliders- stock footage and images
- Showing 15169 to 15174 of 21917 results more
more Hide
Hide
German forces plan and attack at Liege, Belgium in World War 2
Sand table animation shows plan of attack on Liege. Point of application for initial thrusts is Fort Eben Emael on border of Belgium and Netherlands. Map illustrates bombardment fron the air by the Luftwaffe (German Air Force). River Meuse and the Albert canal in the city. Bridge on the river. First line-the Ijssel position, second line-the Grebbe position, third line-the the Meuse position, fourth line- the Peel position. Fifth line-the Willem canal fortification and sixth line-the Albert canal fortification. Soldiers move in trucks on the street. German assault and shock troops use rubber boats with ladders to cross river Meuse under fire. Mechanized German infantry and bicycle contingents cross river Meuse over bridges not destroyed. Houses and buildings alongside the street. Soldiers fire guns in field. Smoke arises due to the firing. Soldiers at a boat in the waterway. Destruction of Werk 4 bunker fortification at Fort Eben-Emael. Wreckage from bombardment. Heavy smoke arises from firing and bombardment. Captured Dutch and Belgian Prisoner of War soldiers walk on the street under guard of German soldiers during German occupation. (World War II period).
German Generals plan and execute attack west toward France, penetrating the Maginot line in World War II
Film opens with animated map showing plan to attack to the west against France, employing Heeresgruppe A, commanded by Marshal Gerd von Rundstedt. View of Marshal von Rundstedt in a planning session with staff officers. The animated map shows other German forces in the Westward offensive, including armies under Field Marshals Günther von Kluge; Wilhelm List; and Ernst Busch. It depicts the French defensive Maginot line and the concentration of German forces, under Marshals Von Kluge and List, to pass through it and drive to the coast of the English Channel, cutting off attacking English and French attacking armies. Views of German troops advancing westward. They follow a tank firing rounds. Others are seen carrying large boats to cross rivers and some unloading timbers and other items to repair bridges as they proceed under fire with shells bursting all around. A Panzer I (Panzerkampfwagen I Ausf. A) advances and German infantry gather explosives from rubber boats. Infantry follow a Panzer I tank firing its guns as it moves across a field. German infantry paddle across a river in rubber boats. They uncoil and lay long wires along the ground. Other use prefabricated timbers to cover a pontoon bridge, or barge. . German utility vehicles drive along a shallow river bed. Large numbers of German soldiers along with horses, cross a river in boats and barges. A Panzer I tank drives onto a pontoon barge. German soldiers and a civilian ride atop a Panzer I tank. Scene shifts to Field Marshal Günther von Kluge strolling victoriously to a German headquarters in France, where he exchanges greetings with other officers. Remaining scenes focus on the ordinary German soldiers.They are seen preparing meals; napping; tending to horses; dealing with their equipment and armor, including a Half Track Personnel Carrier (Hanomag Sdkfz 251/1). Brief glimpse of German officers in planning session outdoors.
An OS2U Kingfisher scout seaplane lands in sea off Majuro Atoll, Marshall Islands during World War II
U.S. warships off Majuro Atoll, Marshall Islands, during World War 2. An OS2U Kingfisher scout seaplane, from one of the ships flies overhead, circles, and lands on choppy waters. The aircraft porpoises in the chop before settling down to taxi. A small boat is nearby.
American marines advancing past abandoned Japanese positions during Battle of Saipan in World War II
U.S. marines approach a Japanese concrete bunker during battle of Saipan in World War 2. Others move across and open field. Fire burning near an abandoned Japanese wheeled cart. Dead Japanese soldiers lying near their abandoned Type 92 Heavy Machine Gun on its tripod.
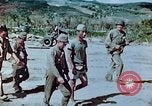
Japanese prisoners of war taken in the battle of Saipan during World War II
U.S. marines escort less than a dozen Japanese prisoners of war, following the battle of Saipan, in World War 2. The Japanese prisoners all have their heads bent down and eyes averted, as they walk.
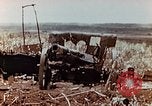
Wrecked Japanese artillery and tanks on Saipan in World War II
Views of wrecked Japanese artillery pieces and a knocked out Type 95 light tank, on Saipan during World War 2. U.S. marines walk past the tank and pause near another one, still smoking. View of dead Japanese soldier lying next to another destroyed tank.
CRITICALPAST.COM: About Us | Contact Us | FAQs - How to Order | License Agreement | My Account | My Lightboxes | Shopping Cart | Advanced Search | Featured Collections | Website Terms & Conditions | Privacy Policy ©2026 CriticalPast LLC.
License Agreement |
Terms & Conditions |
Privacy Policy
©2026 CriticalPast LLC.