


 Francais
 Deutsch
 Italiano
Refine Your Search
Ubon AirForce Base Thailand 1967 stock footage and images
- Showing 3151 to 3156 of 5487 results more
more Hide
Hide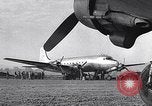
A YR-4 helicopter Pilot attends to a crashed B-25 and carries an injured in Burma during World War II.
A YR-4 helicopter being unloaded from a C-54 aircraft in Burma during World War II. Air jungle rescue unit Pilots of 10th Air Force fly YR-4 to attend to a crashed B-25. Pilot paints a big yellow cross on the plane's wing and checks instruments. The helicopter flies back to the home base. Rescue mission members briefed before leaving for Naga Hills. Helicopter YR-4 lands at a helipad and takes off with an injured soldier.
U.S. Army battles against fortified Japanese forces during World War II, in Manila, Philippines
Wartime news film entitled: "Manila Cleanup." View of the Pasig River, dividing North and South Manila. American tanks and tank destroyers on North bank, firing at Japanese positions on the South side of the river. Exploding shells on South side. U.S. troops fire 155mm howitzers at low elevation, blasting the walls of Intramuros and adjacent buildings. The 540th Field Artillery fire 240mm guns point blank against the ancient walls. Troops firing machine guns at the Colegio de San Juan de Letran and Manila Post Office buildings. Troops of the 3rd Battalion, 129th Infantry, 337th Division, crossing the river in small assault boats, under covering fire. Landing on the South Bank, troops fan out around and about the walled city. Japanese forces resist from fortified pill boxes and machine gun nests near the public buildings. U.S. troops breach a section of the wall and elements of the 37th Division enter Intramuros on February 23, 1945. U.S. soldiers sheltered behind wall as others employ flame throwers. U.S. Soldiers prepares a TNT charge to blow up walls and seal underground passageways. A destroyed Japanese pill box at base of wall with many dead Japanese soldiers are seen. U.S. artillerymen firing 155mm howitzers directly at Japanese troops holed up in the Legislative, agricultural and finance buildings. Troops of B Company, 148th Infantry Regiment, advance from the Manila City Hall, towards the Legislative building. They direct flame throwers at Japanese fortifications under the wall. Soldier with flame thrower passes through group of riflemen and fires into hole in wall. U.S. soldiers fighting room to room in the walled city. On February 24th U.S. troops defeat the last Japanese resistors of Manila in World War II.
The Battle of Iwo Jima in World War II
Scenes filmed by Navy and Marine combat photographers, of the Battle for Iwo Jima, in February and March, 1944, during World War 2. View from a boat offshore, of Mount Suribachi, on the Island of Iwo Jima. Warships of the U.S. 5th Fleet attack with naval gunfire, as landing craft manuever near shore. U.S. Marines aboard Landing Vehicles Tracked (LVTs) head for the beach, with the heavy cruiser, USS Baltimore (CA-68) in the background. U.S. Carrier-based Grumman TBF Avenger aircraft drops bombs on Mount Suribachi. Landing craft arriving at a fairly level area of beach. U.S. marines moving cautiously on the beachhead. The USS Baltimore and a Fletcher class destroyer offshore in background. Marines hunkered down with smoke rising near them, and then moving forward again, through the black sands. Closeup of a marine with flame thrower. Several U.S. Chance Vought F4U Corsair aircraft fly overhead, dropping bombs on the mountain. Marines continue to move forward, under constant fire from Japanese small arms. A heavy landing craft Infantry, LCI(H) moves toward shore in background. A DUKW ("Duck") coming ashore. Marines using a crane to offload a 105mm howitzer from a landing craft. As they raise the gun, the landing craft moves away and marines Hook the howitzer to a DUKW to help move it. Next, marines are seen setting up two 105s on the beachhead and firing them. Marines with more artillery pieces stacked on the beachhead. A gunboat, LCI (G), firing from close to the shore behind them. Marines digging in sand that the narrator calls the floor of an active volcano. Smoking sulphur gases are seen rising behind them. The USS Baltimore firing her guns from close to shore. Machine gun tracer rounds crossing the beachhead, as Naval gunfire resumes from offshore. Marines crawling and then occasionally sprinting forward across the sand dunes. (One carries a stretcher.) Four marines carrying one wounded back to the beachhead, on a stretcher. Two marines carry another between them. Marines scrambling over brush and rough ground. View from hillside of marines climbing up from below, as shell bursts only a few yards away. Scene shifts to later in the battle for Iwo Jima. A catapillar tractor is parked near bodies of Japanese soldiers strewn across the landscape. (Narrator notes that more than 14 thousand such dead had been counted by March 6, 1944.) Finally, the iconic moving images of U.S. marines raising the American flag over Mount Suribachi.
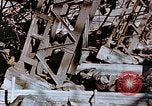
Building destroyed by atomic bombing in Nagasaki, Japan during World War 2
After effects of atomic bombings in Nagasaki, Japan during World War II. Concrete base of a column and point at which failure occurred. Destroyed roof above a bank of metal lathes. Japanese move the wheel of a machine. Native carpenters work on pieces of wood.
Japanese surrender on board United States Navy ship Missouri in Pacific during World War 2
American sailors occupy a Japanese naval base south of Yokohama in Japan. Destroyed Japanese aircraft are seen. Japanese workers prepare for the arrival of General MacArthur. A B-29 aircraft lands and General MacArthur gets down from the plane. Surrender ceremony takes place aboard United States Navy Battleship USS Missouri (BB-63), as large number of soldiers and sailors witness it. An 11-member Japanese delegation photographed by cameramen. Japanese Foreign Minister and General MacArthur sign the surrender papers. General Wainwright also signs them. A map shows Allied zones of occupation.
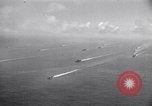
Japanese fleet maneuvers and live fire exercise at sea in World War II
Japanese Imperial Navy exercises in the Pacific Ocean during World War 2. Several Japanese destroyers at sea. A Japanese submarine on the surface, viewed from beneath heavy guns of a battleship or heavy cruiser. Pilot and second-seater climbing aboard their 3-position Japanese Aichi E13A (Jake) observation float plane, which is then catapulted from the ship. A Japanese aircraft carrier is launching aircraft that fly about the area at low altitude. Destroyers maneuver. A carrier-based Mitsubishi A6M Reisen (Zeke / Zero) flies overhead. Sailors fire Type 96 25mm twin-mounted antiaircraft guns. Battleships and cruisers fire heavy guns.
CRITICALPAST.COM: About Us | Contact Us | FAQs - How to Order | License Agreement | My Account | My Lightboxes | Shopping Cart | Advanced Search | Featured Collections | Website Terms & Conditions | Privacy Policy ©2026 CriticalPast LLC.
License Agreement |
Terms & Conditions |
Privacy Policy
©2026 CriticalPast LLC.