


 Francais
 Deutsch
 Italiano
Refine Your Search
Vietnam Bien Hoa Air Base 1968 stock footage and images
- Showing 9787 to 9792 of 13286 results more
more Hide
Hide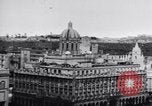
Cuban revolutionaries Fidel Castro, Che Guevara, Raul Castro, and Camilo Cienfuegos advance towards Havana.
Fidel Castro and Che Guevara attack Havana. The Presidential Palace in Havana, Cuba. A soldier keeps vigil from the roof. President Fulgencio Batista with the press and other dignitaries in the palace. Batista's soldiers atop and near tanks. A Batista's Chief of Staff General Francisco Tabernilla talks to the soldiers. The bazooka teams prepare to advance. Fidel Castro seen recording his broadcast for the rebel radio in the Sierra Maestra Mountains. Close up view of a reel to reel tape player running. 1958: Rebels prepare arms and ammunition. Close up views of Che Guevara. Heads of other major revolutionary fronts meet in Caracas. The rebels advance towards Havana. A rebel fires a rocket, an explosion on a hill. The rebels climb uphill and take cover. They jump over fallen trees and across the hills. Batista government Air Force planes drop bombs and fire at the rebels. Explosions due to the bombardments. A man fires a machine gun, while another fires at the aircraft. They fire in sitting and prone position. Castro revolutionary men attack houses on the outskirts of Santa Clara. Batista's men surrender. December 1958: The final assault. The rebels near a building. A large crowd gathered outside the National Guard Police Section. Guevara's men march in a single file on the streets. The Air Force planes continue bombardment. Soldiers in trucks. Townspeople flee to shelters. Explosion due to bombardment. Aircraft in flight. Cars on the road. Women and children take refuge. A doctor checks wounded civilians lying on beds. Women rebels with rifles. Women welcome and greet Che Guevara. Top rebel commander Camilo Cienfuegos among others. Rebels on a building roof. A man buries a relative. Fidel Castro talks to the rebels during a strategy meeting. Fidel Castro's brother, Raul Castro, drinks from a cup. Rebels and civilians in a Willys jeep. A large crowd gathered outside a building around same time that Batista flees Cuba.
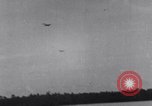
Battle of Los Negros in Admiralty Islands during World War II
On orders from General MacArthur, the 2nd Squadron (dismounted), 5th U.S. Cavalry Regiment, 1st Cavalry Division of the United States Army on a Reconnaissance in Force mission at Los Negros,Admiralty Islands. Prior to their landing, two Spitfire aircraft of No. 73 Wing, Royal Australian Air Force (RAAF) are seen attacking Japanese positions in the jungles near the beach. U.S. Navy warships bombard the area and U.S. B-25 bombers from the 345th Bomb Group , 5th Air Force, drop bombs along the beach. After landing, the Reconnaissance Squadron, reinforced with other U.S. 1st Cavalry Division troops, advances into dense jungles. Troops spray the area with machine gun fire. A Squad seen firing a mortar. U.S. troops firing a field gun with "Bataan" written in chalk, on the barrel. B-25 bombers fly very low over edge of Momote airfield and drop bombs. 1st Cavalry troops battle their way against hidden Japanese forces and capture the Momote airfield. General MacArthur comes ashore and congratulates the troops. A wounded soldier carried on a stretcher. U.S. medics tend to wounded soldiers. Wounded are given plasma. Dead Japanese soldiers on ground.
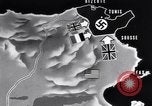
Allied Forces defeat Axis forces in Tunisia during World War II
The final battle of Tunisia, North Africa during World War 2. An animated map shows Allied Forces moving on all sides pressing forward against German forces still remaining in Northern Tunisia. in World War 2. Map outlines battles of Hill 609, Longstop Hill, Goubellat Plain, and Dejebel Mansour, and Takrouna. U.S. forces move 200 miles from the south to confront German forces in the north. Views of U.S. soldiers in trucks and M3 half-tracks, and towing heavy artillery with a tractor. Views of hills where Germans are positioned, west of Tunis and Bizerte. Allied guns firing. French forces sweeping for mines and digging some up with bayonets. French General Alphonse Juin confers with his staff as they review a large map laid out on a jeep. Brief view of French infantry in the field and gunners firing artillery. German Panzer IV tanks moving to counter British attacks. German tanks and artillery firing barrages against the British. Camera pans over destroyed German armor. British 78th Division attacks Longstop Hill. A long line of British infantry moving single file up a hillside. British soldiers firing Vickers machine guns from protected positions and infantry moving uphill, carrying small arms and Bren light machine guns. British troops scaling steep hills, using ropes, as shells burst close to them. One throws a hand grenade that explodes on the hilltop. After reaching the hilltop, the infantry scamper down the other side and continue moving forward, firing their weapons. Several dead German soldiers are seen as the British troops overrun the German positions. British engineers and pioneers working with caterpillar tractors and shovels to build roads. Later, trucks are seen using a new road. In the meantime U.S. troops are seen arriving to commence their assault on Hill 609. It begins with long range artillery firing from camouflaged positions and shells exploding all over on Hill 609. It continues into the night. View of soldiers in artillery headquarters, under a tent illuminated by lanterns. Long sequence of nighttime artillery fire. Medical Corps doctors treating wounded as the nighttime artillery barrages continue. U.S. infantry digging in after taking Hill 609. View of American soldiers walking up Hill 609. View of British Field Marshal Bernard Montgomery consulting with staff officers in the field. British 8th Army commander, Lieutenant General Sir Oliver William Hargreaves Leese, looking through binoculars as he stands with staff members at the front. Scene shifts to U.S. airmen arming machine guns on a parked P-38 fighter plane. Others roughly handling bombs to be placed into U.S. bombers. Bomber with nose art of devil riding a bomb and name "Hell a Poppin." Air crews arrive by jeeps at their B-25 Mitchell bombers and others arrive at their B-17 bombers. View of B-25 number 41-13202 named "Idaho Lassie" of the 321st BG, 445th BS, 12th Air Force. Engines running on bombers and on a British spitfire fighter plane. Formations of Allied aircraft, including B-24 liberator bombers, Martin B-26 Marauder bombers, British spitfire fighters, and B-17 Flying fortress bombers. British and American armor moving forward firing guns. French artillery firing and French infantry advancing. French machine gunners in white hats. U.S. B-24 Liberator aircraft dropping bombs. German fighter planes attacking allied bomber formations. Gunners in the bombers firing at them. Gun camera view of German fighter being shot down. More views of Allied aircraft bombing and strafing. Map shows American forces reaching Bizerte, the British capturing Tunis and German forces split and defeated.
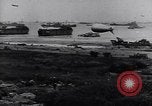
General Patton's 3rd Army moves towards Germany and fights the Battle of Bulge during World War II.
U.S. 3rd Army under Lieutenant General Patton in World War 2. Tanks roll down. U.S. Army soldiers and tanks of the 3rd Army move forward. General Patton looks through binoculars. Patton with other officers. Soldiers fire artillery. A soldier talks into a radio. Patton's troops move forward. Enemy soldiers surrender. Tanks and troops move forward. Soldiers aim and fire. Soldiers in the streets of Saint Malo. German soldiers taken as prisoners of war (POW). Civilians cheer and welcome the American troops. Soldier drinks from cups. A sign reads 'Mayenne'. Troops move towards Germany fighting on their way. Soldiers move through the forest terrain. Patton with his officers. The 3rd Army crosses river Siene. Patton in an aircraft. The planes of the 8th Army Air Force drop bombs on the enemy positions. Tanks fire artillery. Patton with soldiers. Trucks move forward. Headlights of trucks moving forward at the night. Patton comes out of a building and sits in a jeep. Army officers including General Eisenhower and Patton have dinner. Patton with soldiers. Soldiers of the 3rd Army load and fire artillery and capture Metz. Fighting house to house and in the streets of Metz. Dead soldiers lay on the ground. German soldiers taken as prisoners of war. American flag is raised. The battle of Bulge- Soldiers on the snow covered terrain of Ardennes. Patton's 3rd Army moves toward Bastogne. U.S. Army soldiers remove snow from ground in the icy winds. A soldier looks up into the clear sky after snow storms have passed. Aerial view of U.S. Army Air Force Mitchell B-25 bomber aircraft in formation and bombs away views as they drop bombs on snow covered German held positions below. U.S. Army tanks firing at German enemy positions. close up views and point of view shots of American soldiers firing rifles and machine guns. German prisoners are rounded up by U.S. Army, including some German soldiers wounded and bandaged. Patton decorates soldiers at a bridge over the Sauer River. in Germany, where a sign says "General Patton Bridge - built by the Mighty Midgets. Company F, 1303 Engineers" (Narrator in clip is Ronald Reagan).
British Brigadier General Orde Charles Wingate and Chindits in Burma, during World War II
The Chindits or the Indian 3rd Infantry Division of the British Indian Army in Burma during World War 2. The Chindits move through a jungle. Chindits with a pack train climb up a hill. Soldiers carry a wounded soldier on a stretcher. Another wounded helped into a plane. The wounded are evacuated by Stinson L-1 Vigilant.. A Stinson L-5 Sentinel lands. Supplies are brought for Chindits. Soldiers unload supplies from a UC-64 Noorduyn Norseman aircraft and put the boxes on a jeep. The jeep is driven away. Soldiers roll drums near a plane. A tent with supplies. A soldier talks over a radio. Chindits cross a stream in small rubber boats. British Brigadier General Orde Charles Wingate inspects the area. Orde with other officers. One of the officers with a cigarette in his mouth. A plane lands. A plane in flight over a water body. Royal Air Force (R.A.F) pilots fly the plane. Brigadier General Orde with another person in the plane. (First Air Commando aircraft in this film: Stinson L-1, Stinson L-5, UC-64 Norseman, Douglas C-47, P-51A Mustang.)
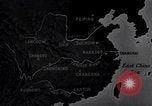
Bombing of Chungking (Chongqing), China, by Japan, in Second Sino-Japanese war
The Republic of China establishes its wartime capital at Chungking (Chongqing), China during the Second Sino-Japanese War. Animated map depicts areas of Japanese occupation and highlights cities including Lanchow (Lanzhou), Chengtu (Chengdu), and Kunming. It highlights Chungking (Chongqing) as the Nationalist Republic of China. Chiang Kai-Shek is seen leading a group of Chinese leaders as they walk through an arched gate in Chungking (Chongqing). A busy street with shops and apartment houses in a commercial district. Busy scene of pedestrians, cart traffic, and automobiles in the road center. Boats on the Yangtze River are seen below long steep steps leading up to the streets above. Houses along the cliffs. Chinese workers digging bomb shelters into the cliffs. View from inside a shelter being hollowed out of the rock. Back in the Japanese occupied area, a car brings a Japanese Air Force leader who addresses a large group of fliers at an airbase. Next, Japanese aviator crews are seen running to their aircraft from their camp on the airfield. They take off in Mitsubishi G3M bombers to attack Chungking (Chongqing). Nakajima Ki-27 airplanes take off from the field and join in large formations overhead. A formation of Chinese World War 1 era aircraft is seen in flight to engage incoming Japanese bombers. Japanese crew member in a bomber sees the Chinese fighters and gunners in the bombers get ready to fire on them. The Chinese fighter planes dive at the bombers but are intercepted by Nakajima Ki-27 airplanes flying cover. Dogfights ensue with Chinese aircraft being shot down, and the bombers continuing their way. Air raid sirens sound in Chungking (Chongqing) and people run to their shelters, including school children. Views of bomber crews at their stations and then of bombs falling with the Yangtze River below. Bombs exploding along the riverfront and inland, along the cliffs. View of machinery operating, and Chinese workers occupied in underground factories in Chungking (Chongqing). Fires burning throughout the city from the bombing, and Chinese fire fighters with hoses working to extinguish fires.
CRITICALPAST.COM: About Us | Contact Us | FAQs - How to Order | License Agreement | My Account | My Lightboxes | Shopping Cart | Advanced Search | Featured Collections | Website Terms & Conditions | Privacy Policy ©2026 CriticalPast LLC.
License Agreement |
Terms & Conditions |
Privacy Policy
©2026 CriticalPast LLC.