


 Francais
 Deutsch
 Italiano

Refine Your Search
Vietnam Binh Thuy Air Base 1967 stock footage and images
- Showing 13321 to 13326 of 13520 results more
 Hide
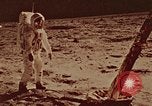
Still images Apollo 11 mission, newspaper headlines, NASA displays at the Smithsonian.
Still photos of the NASA Apollo 11 mission. Neil Armstrong walking on the moon. Buzz Aldrin next to the Passive Seismic Experiment Package (PSE) with the lunar module Eagle in the background. Buzz Aldrin stands next to the United States flag on the moon. Spacesuit and lander on display at the Smithsonian’s National Air and Space Museum in Washington DC. Front pages of major United States newspapers, such as The Miami Herald and Chicago Daily News, report the historic moon landing. Headlines include, "Ohioan Walks on Moon!" "Man Walks on the Moon" and "Americans on Moon." Teenagers looking at Apollo display at the Smithsonian. Empty mission control years after Apollo.

Apollo Mission scenes, Apollo 11 world tour, Launch Complex 34
Consoles in the Mission Operations Control Room 2, the flight control room of the first crewed moon landing (the Apollo 11), at NASA Johnson Space Center in Houston, Texas. Closeups of console labels read “CAP COMM”, “Flight Director 02”, “Life Systems Officer”, “Flight Dynamics Officer”, and “Guidance Officer”. Craters on the lunar surface during Apollo 8. Famous "Blue Marble" view of the earth from space, as seen from the moon. Apollo 9 astronaut Dave Scott exiting hatch of capsule for his extravehicular activity. Apollo 9 lunar module “Spider” moving across moon surface. The Apollo 10 Command and Service Module in orbit around the moon. View of empty mission control, Houston. Boy Scouts carrying flags of the United States in a parade. Drum in marching band. A window displays a photo of Buzz Aldrin, under the words “Our Hero”. Buzz Aldrin waves to cheering spectators. Michael Collins smiles. An Indian bagpipe band marching. French dignitary awards Michael Collins. Asian Boy Scouts cheer and women dance during the three astronauts’ international “Giantstep Apollo 11 Presidential Goodwill Tour." A masked native dancing. Neil Armstrong waves at people as he sits with Amsterdam mayor Ivo Samkaldenfrom in a boat sailing in Amsterdam’s canals. Dutch people waving at Neil Armstrong from a bridge. Ticker tape parade in honor of Apollo 11. Balloons flying over parade. Apollo launch site. Emergency phone numbers sign posted at Cape Kennedy. View of the remains of the Cape Canaveral Air Force Station Launch Complex 34, the site of the Apollo 1 cabin fire that killed Command Pilot Virgil I. "Gus" Grissom, Senior Pilot Ed White, and Pilot Roger B. Chaffee—and destroyed the command module (CM).

German Luftwaffe shoot British RAF Hawker Hurricane aircraft over Malta during WW2
German Luftwaffe attack British Royal Air Force (RAF) Hawker Hurricane aircraft over Malta during World War 2. A German Luftwaffe pilot gets into the cockpit of a Messerschmitt Bf 109. Ground crew member helps pilot in putting on his helmet before flying. A Messerschmitt Bf 109 takes off from a German airfield in Sicily, Italy. A group of fighters take off, heading for Malta. Aerial views of the coast of Malta. Gun camera footage from Luftwaffe aircraft shows Bf 109 shooting down British Hawker Hurricane aircraft. British aircraft on fire and crashing into ocean.
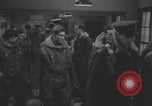
RAF crew of Vickers Wellington OJ-F start engines during WWII.
Period dramatization: British Royal Air Force (RAF) bomber pilots, part of No. 149 Squadron RAF suit up after a briefing on a mission during World War 2 at RAF Mildenhall. A pilot finds his helmet under a seat after a meeting. View of a Vickers Wellington OJ-F 'F for Freddie'. Crew disembark from a military truck after their arrival at bomber. Crew climbs ladder into bomber. View inside Wellington bomber as crew prepares for mission. Radio operator seated and adjusts radio. Pilot puts on his helmet inside the cockpit. A nose gunner climbs through fuselage of Wellington bomber to the nose gun. View outside bomber as gunner prepares inside nose gun. Pilot yells, "start her up" as ground crew members hold bag against engine manifold during startup. Propeller of Vickers Wellington OJ-F begins to move. Other engine is similarly started. Vickers Wellington bomber running its engine before takeoff. Ground control equipment that appears to be ground controlled approach radar equipment (GCA) is towed into place on the airfield.
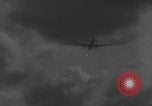
British Vickers Wellington bomber commander radios his crew members while in flight during WWII.
Period dramatization: Vickers Wellington bomber in flight over RAF Mildenhall air field during World War 2. Vickers Wellington OJ-F navigator removing maps from his pack. Pilot and copilot seen through bomber cockpit window at night. The commanding officer radios his crew. View of nose gunner at night as he replies, "I'm OK skipper." Another crew member puts on an oxygen mask and replies. Crew members each reply, including radio operator at his controls, who says, "well, it seems to all be here, sir." Commanding pilot communicates with the copilot inside cockpit, saying, "hello second pilot, ready to do some oil pumping?" The copilot replies, "that's all a second pilot's for!" “Freihausen, here we come” says the commander (Note: Freihausen is a fictitious location). Vickers Wellington OJ-F , part of No. 149 Squadron RAF, in flight at night.
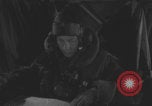
RAF Vickers Wellington bomber drop bombs over Germany at night (WW2) (dramatization)
Period dramatization: A Royal Air Force (RAF) navigator of Vickers Wellington bomber looks at his maps during World War II. Commanding pilot of Vickers Wellington bomber radios navigator, asking, "where are we now" as they approach Germany at night during WW2. Navigator replies, "I can't tell where we are." Crew member gives thumbs up signal after command. Plane descending in altitude. Low angle shot of bomber commander pilot at yoke steering as he radios to crew, "hello everybody, let me know if you see anything." Bomber spinning propeller while in flight at night. Crew member radios, "hello skip, search lights and flak at starboard quarter." Bomber commander replies, "the natives appear hostile." Bomber navigator using calipers on maps at night speaks into mask, "hello skipper, the target's about 50 miles up river." Bomber pilot replying, "OK." Vickers Wellington bomber banking turn at night. Bomber navigator climbing to viewing window with map and radios, "I can see the canal as plain as my face." Pilot radios back, "OK, I'll turn around and check up." Bomber pilot radios, "any signs of life?" German soldiers at night running to anti-aircraft artillery and yelling, "fire" as guns fire. Flares at night as bomber crew radio to each other. Vickers Wellington bomber nose gunner moves gun at night and strafes targets. German artillery fires more as the Vickers Wellington bomber dives towards target. Bomber pilot face lit by night flares. Crew hand actuating switches on control panel to open bomb bay doors. Crew member heard saying, "bomb bay doors open." Crew member looking through Vickers Wellington bomb sight at night. Close up, hand pressing button to release bombs on Vickers Wellington bomber. Dramatization special effects using miniature buildings of bombs dropping on railway and oil storage facility. Side view outside Vickers Wellington bomber at night as nose gun fires. Bomber crewman radios, saying "I got a bulls eye with the last one." Pilot radios back, "good man."
CRITICALPAST.COM: About Us | Contact Us | FAQs - How to Order | License Agreement | My Account | My Lightboxes | Shopping Cart | Advanced Search | Featured Collections | Website Terms & Conditions | Privacy Policy ©2026 CriticalPast LLC.
License Agreement |
Terms & Conditions |
Privacy Policy
©2026 CriticalPast LLC.