


 Francais
 Deutsch
 Italiano
Refine Your Search
+"United States USA" +1938 stock footage and images
- Showing 79 to 84 of 205 results more
more Hide
Hide
U.S. Army pre-World War II bayonet instruction video on the short guard position.
A detailed video describing the purpose and positioning of the short guard bayonet position. Closeups of hand positioning on the rifle in short guard position, and closeups of one soldier wearing pre WW2 Service shoes and lace-up canvas leggings. Also contains instruction on the non-verbal command for instructors to indicate the short guard position.

U.S. Army pre-World War II bayonet instruction video on the high port position.
A detailed video describing the purpose and positioning of the high port bayonet position. Also contains footage of a soldier demonstrating the use of high port when attacking an enemy trench. Soldier charges at and jumps into the trench in high port position, before switching to guard position and spearing a decoy.
U.S. Army pre-World War II bayonet instruction video on the rest position.
A detailed video describing the purpose and positioning of the rest bayonet position. Contains closeups of both rest and guard position, and examples of practicing transition in and out of this position with a larger group of trainees.

U.S. Army pre-World War II bayonet instruction video on the whirl move.
A video detailing how to perform the whirl move with a bayonet. How to perform the whirl move from a run and from a static position. All combinations are first shown slowly and then at full speed. Common mistakes made when performing the whirl move.
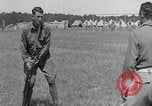
U.S. Army pre-World War II bayonet instructor training video for practicing bayonet movements with a large group.
A video for bayonet instructors detailing how to rehearse bayonet movements with a large group of soldiers. Clip shows positioning of a large group to best rehearse these movements, as well as how to pace exercises while trainees become more familiar with the movements.
U.S. Army pre-World War II bayonet instruction video on the vulnerable parts of the body.
A detailed video describing the vulnerable parts of the body and, in the case of the throat and the armpits, how best to inflict damage upon those parts with a bayonet. Narrator describes vulnerable parts as the neck, face, chest, lower abdomen, thighs, kidneys, and armpits.