


 Francais
 Deutsch
 Italiano
Refine Your Search
Colombey-les-Belles France 1918 stock footage and images
- Showing 193 to 198 of 6520 results more
more Hide
Hide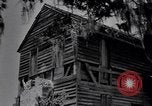
Forks of Cypress plantation home and other sites, likely in Alabama, circa 1939; African American man tending a large bell.
From the U.S. Department of Agriculture documentary "The Land." A seemingly abandoned, dilapidated house at an unidentified farm or former plantation location, possibly in Alabama, during the Great Depression. Spanish moss hanging from nearby trees. Views of a different, wooden, rundown house with a front porch, possibly at a different location. Scene changes again to a third different house, this one made of brick. A lone African American man emerges from double doors of the house. He walks up to a bell, cleans it, and rings it. Distant open view in front of the bell includes a valley and river (possibly the Tennessee River in western Lauderdale County, but not confirmed.) Scene changes again to show the first house and the trees with Spanish Moss. View returns to the location with the man tending the bell. Next scene shows the Forks of Cypress plantation house in Florence Alabama, (Lauderdale County). View of the old main Greek Revival Forks of Cypress house built in 1830 for James Jackson. View of the west elevation of the house. The smokehouse is seen behind and to the side of the main house. A clothes line with clothes on it is beside the smokehouse. Chickens walk on the porch of the house, past its tall colonnade of 24 ionic columns. (Note: The house burned completely in a 1966 fire). Next scene is again the elderly African American man at the brick house location. He looks around, mumbling to himself, walks back towards the house, and pauses on the front steps. The first wooden house with Spanish moss in nearby trees is shown again. Scene returns to the elderly African American man who enters the brick house and closes the doors behind him. Film directed and narrated by Robert Flaherty.
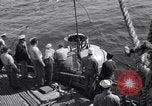
Men exit hatch of diving bell taken from ship of Atlantic convoy alongside in Iceland.
Men exit hatch of diving bell taken from ship of Atlantic convoy alongside in Iceland. Officer at pelorus. Surfaced submarine. Man signals semaphore. Chain pays out over rail. Officer at small range finder. Motor whale boat tows heavy line from side of ship. Men work with winches and other deck gear. Motor whale boat underway, very rough sea. Diver placed on platform and lowered over the side into water. Diver raised from water on platform and lowered to deck. Men enter large diving bell handing from cable alongside ship. Large diving bell sinking in the water.

New conveyor system in use at Bell Aircraft Plant, Niagara Falls.
Views of conveyor system in use at Bell Aircraft Plant, Niagara Falls. War production workers inspecting and working with aircraft moving on belt. Bell P-39 Airacobra taking off. Views of Bell P-39 Airacobra in flight. (World War 2 era war production effort.)
U.S. B-17s of 91st Bomb Group (including the "Memphis Belle") leave Bassingbourn Airfield on bombing mission in World War 2
B-17 bombers of the U.S. 8th Air Force, 91st Bomb Group, take off from their base at RAF Bassingbourn. Views from inside the B-17, "Memphis Belle." The landing gear of the "Memphis Belle" retracting into the wheel well. Views of English countryside, including many RAF airfields. B-17s in close formation. Crew members of the "Memphis Belle" are seen at their duty stations inside the aircraft, including: Captain Robert Morgan,Pilot; Captain Jim Vernis,Co-Pilot; Sergeant Robert Hanson,Radio operator and gunner; Captain Chuck Leighton, Navigator; Sergeant Harold Loch,Flight Engineer and Top Turret Gunner; Sergeant John Quinlan, Tail-Gunner; Sergeant Cecil Scott, ball turret gunner; Captain Vince Evans,Bombardier ; Sergeants Bill Winchell and Tony Nastal, Waist gunners. Pilot , Captain Morgan, alerts crew and dons his oxygen mask as they climb through ten thousand feet. View of coast of England as they leave. Temperatures drop and contrails form as the formation of B-17s climbs to 25 thousand feet.
B-17s of 91st Bomb Group, including the "Memphis Belle," return from mission over Wilhelmshaven, Germany.
One by one, 29 B-17 aircraft of the 91st Bomb Group (out of 36 launched) return from their bombing mission over Wilhelmshaven, Germany during World War 2. Many suffered battle damage and have wounded crew aboard. The B-17, "Dame Satan," is seen with large holes in it. The B-17, "Old Bill," is shot to pieces, with its nose missing. Lieutenant Colonel Stanley T. Wray waits in control tower as three more aircraft arrive, including the "Memphis Belle." Her crew members relax and smile as she lets down to land. Her pilot, Captain Morgan buzzes the airfield before landing to complete their 25th bombing mission. They are congratulated by well wishers on the ground. Their crew chief paints the 25th bomb on the "Memphis Belle" fuselage. Change of scene: Brigadier General Haywood S. Hansell, Jr. awards a Distinguished Flying Cross to each crew member. Change of scene: King George VI and Queen Elizabeth, of England, visit the flight crew and ground crew of "Memphis Belle" and converse with them. Change of scene: Lieutenant General Jacob L. Devers, Commander of U.S. Army Forces in Europe, and Major General Ira Eaker, Commander of the 8th Air Force, visit and greet the crew. General Devers reads their orders to return to the United States and encourage Americans on the home front.
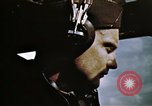
Pilot Robert K. Morgan at the controls of the B-17 Flying Fortess "Memphis Belle" during a mission
Mission footage outtakes from the film "Memphis Belle". The B-17 Flying Fortress known as "Memphis Belle" in flight in the European Theater. Pilot of the Memphis Belle, Robert K. Morgan, at the controls. He wears an oxygen mask and earphones. View of ground area beneath the aircraft, including an airfield. Exterior view of turret gun rotating
CRITICALPAST.COM: About Us | Contact Us | FAQs - How to Order | License Agreement | My Account | My Lightboxes | Shopping Cart | Advanced Search | Featured Collections | Website Terms & Conditions | Privacy Policy ©2026 CriticalPast LLC.
License Agreement |
Terms & Conditions |
Privacy Policy
©2026 CriticalPast LLC.