


 Francais
 Deutsch
 Italiano
Refine Your Search
Italy airfields stock footage and images
- Showing 1927 to 1932 of 3777 results more
more Hide
Hide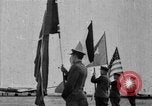
Lord Tedder and General Spaatz arrive and are greeted by Soviet officers in Berlin, Germany.
Surrender of the German Army in Berlin, Germany during World War II. Flags of the Allies are unfurled at the Tempelhof airfield. Lined up cars at the airfield. An English airplane arrives with Royal Air Force Marshal Arthur William Tedder (Lord Tedder) and U.S. Army General Carl Andrew Spaatz. Lord Tedder and General Spaatz shake hands with Soviet officers including Soviet Marshal Vasily Danilovich Sokolovsky. Field Marshal Keitel and staff arrive. A band plays as Soviet troops march. German Field Marshal Wilhelm Keitel enters a car and reads surrender papers. Lord Tedder and other officials get into cars. The cars are driven away from the airfield.
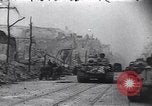
Contrasting views of Berlin, Germany from 1945 to 1943, to 1945 again, during World War II
Soviet Forces battling in Berlin during 1945, in World War 2, employ tanks and heavy machine guns. A Soviet soldier herds two German prisoners from a building. Groups of German soldier prisoners struggle through rubble as they are led from buildings, under guard. Soviet tanks firing as they pass a church building. A Soviet heavy gun being fired point blank on a Berlin street during Battle of Berlin. Buildings on fire. Soviet soldiers firing artillery field pieces. Views of destroyed and damaged German military aircraft on and in hangars of an airfield. Soviet Ilyushin II aircraft land on the airfield. Closeup of distressed German General rubbing his eyes. Flashback in time to 1943, in World War II. Field Marshal Hermann Goering is seen reviewing flyers of a German Luftwaffe (Air Force) unit. A Junkers Ju 52 trimotor aircraft lands and parks on an airfield. Italian leader Benito Mussolini steps from the aircraft after his rescue from imprisonment by the Italian Government at the Hotel Campo Imperatore. He is personally welcomed by Adolf Hitler, who had ordered the mission to rescue him. Change of time, again, to 1945, when Berlin, Germany is attacked by Forces of the Soviet Union. Closeup of a despairing German General. Scenes of utter destruction as Soviet troops batter Berlin, Germany with artillery. Soviet soldier steps down from his tank and gives a Soviet General a handgun, which he pockets and then leads a group of Soviet officers into a building
German narrated film shows operations of Allied forces attacking German-held Holland during World War II.
German narrator describes a map of the plan of an Allied aerial and land operation, pointing at locations in the Netherlands including Nijmegen and Arnhem and Eindhoven. British bomber aircraft parked on a British airfield. Still images of British gliders on airfield being loaded with equipment including tanks. Still image aerial view of British glider flying, attached to tow rope. A British airfield filled with parked gliders and a British soldier driving a jeep into the belly of a glider transport.
RAF ground crew refuelling and loading bombs on a 211 Squadron Blenheim in Egypt, during World War II
The Royal Air Force (RAF) in World War 2, in the Middle East. A British flag flying atop a flag pole. A British Bristol Blenheim I aircraft parked on a Western Desert airfield near El Daba. RAF ground crewmen standing nearby. Can by can, they refuel the aircraft, of 211 Squadron. Four-gallon petrol cans lying on the airfield. 250lb bombs loaded on a trailer. The bombs are loaded in the aircraft. British aircrews pose, ready to depart on a mission. Blenheim bombers taking off on the sand airfield. Avro Anson Bristol Bombay transport aircraft taking off.
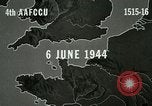
U.S. 9th Air Force B-26 aircraft drop bombs on communication lines in Normandy, France during World War II.
U.S. 9th Air Force air attacks against France on the D-Day during World War II. U.S. 9th Air Force C-47 Skytrain aircraft and gliders marked with invasion stripes on an airfield in England. Airborne infantrymen on the airfield. Men load equipment aboard a CG-4A glider. Infantrymen board the aircraft. Air borne medical units board the aircraft. Tug aircraft and gliders being joined by a line. C-47 aircraft taxi and take off towing the gliders from the airfield. Aerial view of the aircraft on the air field. The aircraft fly over a light house. Aerial view of an invasion fleet underway in the English Channel for the invasion of Normandy. U.S. Army Air Forces B-26 Marauder in flight over the English Channel. Ships and landing crafts at the Normandy beach. U.S. Army Air Forces B-26 Marauders blast communication lines in Normandy. Billows of smoke rises as bombs hit the targets. Aerial view of the invasion fleet heading towards Normandy.
Vickers Wellington No. 149 Squadron RAF takes off during WW2
Period dramatization: British Royal Air Force (RAF) station groundcrew assist Vickers Wellington No. 149 Squadron RAF during taxiing and take off from RAF Mildenhall airfield during World War 2. A ground control crew member salutes to an officer, the air controller, entering the control room of a portable ground controlled approach radar equipment (GCA) room. Air controller stands on a wooden stool to look through a bubble window in the control room’s ceiling. Air controller tests his radio, saying, "ground control, are you receiving?" View of air direction indicator on air field. Engines running on Vickers Wellington bomber at sunset along with "OC" on fuselage. “You may taxi out and take off!” the air controller says after a pilot asks for clearance on the radio. A Vickers Wellington bomber taxiing. Evening view of lighted bubble window of air control trailer as air controller inside watches the Vickers Wellington bomber taking off. Vickers Wellington bomber flying over RAF Mildenhall airfield. “C for Charlie airborne sir! Nineteen hours thirty-five minutes!” a RAF officer says as he enters air control trailer. Air controller standing in control room dome relays information, saying, "C Charlie took off 19:35." Inside air control headquarters at RAF Mildenhall as RAF officer smokes a pipe while another RAF officer writes flight information on the blackboard. More Vickers Wellington bombers taxi and take off from the airfield one by one. Vickers Wellington OJ-F 'F for Freddie' kicking up dust as groundcrew watches. Vickers Wellington OJ-F 'F for Freddie' taking off as the last Vickers Wellington bombers in No. 149 Squadron departs for Germany at night. View of pilot in Vickers Wellington as he radios to crew, "OK chaps, here we go!" RAF officer writes down the last aircraft’s departure time as “19:51”.
CRITICALPAST.COM: About Us | Contact Us | FAQs - How to Order | License Agreement | My Account | My Lightboxes | Shopping Cart | Advanced Search | Featured Collections | Website Terms & Conditions | Privacy Policy ©2026 CriticalPast LLC.
License Agreement |
Terms & Conditions |
Privacy Policy
©2026 CriticalPast LLC.