


 Francais
 Deutsch
 Italiano
Refine Your Search
Japanese-martial-arts stock footage and images
- Showing 1033 to 1038 of 4336 results more
more Hide
Hide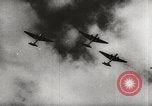
Japanese propaganda film reenacting the sinking of the HMS Prince of Wales and HMS Repulse
From a Japanese propaganda newsreel. Blend of actual and reenactment scenes depicting the sinking of the HMS Prince of Wales and the HMS Repulse off the coast of Singapore. Japanese Mitsubishi-96 bombers overhead in formation. Japanese aircraft drop bombs on the British ships. Large explosion on British battleship as it is struck by a torpedo. British flag on the mast of a ship. Japanese pilot speaks over mouthpiece, seated in cockpit of Mitsubishi-96 bomber. Another pilot looks through binoculars. (World War II period).
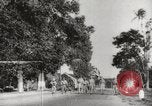
At the Ford factory in Bukit Timah, Japanese officer interrogates surrendering British officers.
British delegation escorted by Japanese guards, carry British flag and a white flag of surrender in hand. They enter a Ford Motor factory building at Bukit Timah, headquarters for the Japanese forces, and are seated around a table. Japanese high ranking officers arrive by car. They enter building and sit across the British soldiers. The British delegation members include Lieutenant General Percival, Brigadier Newbigging, Brigadier Torrance, and Major Wild. The lead officers for the Japanese are Lieutenant General Sugita and Lieutenant General Tomoyuki Yamashita. Scenes of the surrender discussions are shown including discussion between Yamashita and Percival, as Percival examines surrender documents. (World War II period).
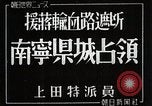
Japanese troops attack and capture Nanning in China.
Japanese troops capture Nanning in China. Japanese troops march amidst mountains in China. They march with artillery. They cross Ford River by wading with horses. Japanese troops attack city. Explosions in city. The flag of Japan. Japanese troops march on horseback. View of victory march. (World War II period).
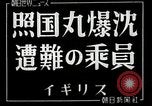
Japanese crew of ship Terukuni Maru following rescue by British
Crew of the disaster hit ship Terukuni Maru, which had been carrying mail, cargo, and passengers on its way from Yokohama, Japan, to London, United Kingdom, when it struck a German mine near Sunderland in the North Sea, early in World War 2. Japanese crew eats food at table. British rescuers serve tea and sandwiches to crew members. British officers providing first adi to rescued crew members. Members of Japanese crew smile. Group of Japanese uniformed officials talk. British and Japanese officials in discussion. Scene changes to views of British civilians: Five men in suits talking just outside a building. Closeup views of the men. (One man looks very much like Lucien Raimbourg.) Man and woman at dining table having tea service. Three women at the table. Elderly woman talks to another woman.
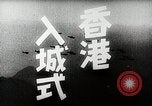
Japanese troops march into the city of Hong Kong at conclusion of the Battle of Hong Kong.
Conclusion of Battle of Hong Kong between Japanese and British forces. Japanese airplane in formation fly above mountains. Aerial view of city of Hong Kong. Soldier stands holding the Japanese flag. Japanese troops and officers parade on the streets of Hong Kong. (World War II period).
Japanese bombers attack Allied warships during Battle of Java Sea
Animated map shows area from Java Island past Asian mainland to Japan. It shows path of Japanese long range bomber aircraft from Japan to Borneo. Loose formation of bombers is seen in flight above clouds. View inside cockpit of Japanese bomber shows a child's stuffed doll hung near the windshield. Extreme closeup of crew members in cockpit of Mitsubishi Ki-21 bomber in flight. More views of aircraft in formation flying above clouds. View from a bomber of Allied warships executing evasive maneuvers in the sea below. Formation of Japanese bombers in flight toward the camera. Airborne camera focuses on one ship below during evasive maneuver. Japanese crew members in their cockpit. View from the aircraft of bombs exploding in water near Allied ship trying to evade them. One appears to have struck the ship.
CRITICALPAST.COM: About Us | Contact Us | FAQs - How to Order | License Agreement | My Account | My Lightboxes | Shopping Cart | Advanced Search | Featured Collections | Website Terms & Conditions | Privacy Policy ©2026 CriticalPast LLC.
License Agreement |
Terms & Conditions |
Privacy Policy
©2026 CriticalPast LLC.